
Free Crochet Marshmallow Pattern That Adds Instant Charm
Create soft, adorable mini treats with this Free Crochet Marshmallow Pattern that adds charm to keychains, ornaments, or small decorations.
Creating miniature crochet items enhances skill and attention to detail while exploring texture in small-scale projects. This pattern guides makers in forming soft, puffy marshmallows using simple crochet techniques. Each piece achieves a realistic yet charming appearance, offering an enjoyable project suitable for both beginners and experienced crocheters.
Cute Free Crochet Marshmallow Pattern Step by Step

Beyond their cute and functional appeal, these crochet marshmallows reflect the care and creativity behind handmade work. Each finished piece highlights attention to detail and adds charm to everyday accessories. Whether used to decorate a space, personalize a bag, or shared as thoughtful gifts, this pattern provides a fun and engaging way to enjoy crochet while producing adorable, versatile miniatures.
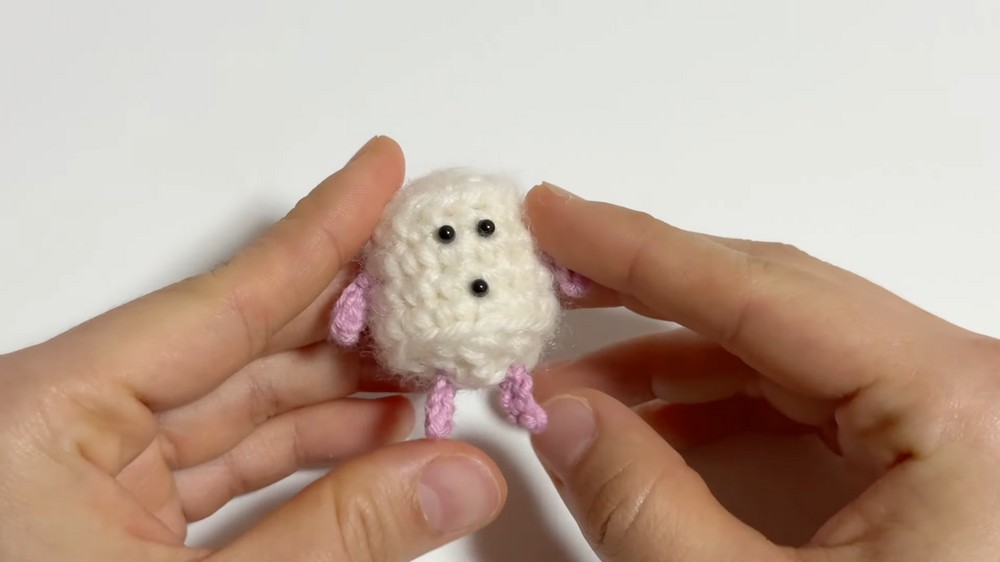
The Crochet Marshmallow Pattern includes clear, step-by-step instructions to ensure consistent results, making it easy to shape marshmallows perfectly. Different yarn colors can be used to personalize each piece, from classic white to playful pastel shades. These miniature marshmallows serve multiple purposes, such as keychains, ornaments, or decorative accents. Their compact size allows for quick completion, making it possible to create several at once for gifts or home display.
Crochet Marshmallow Cat Amigurumi Pattern
Materials
- Yarn:
- Main Color: White (soft acrylic “marshmallow”/hairy or plush yarn)
- Secondary Color: Any light yarn (if desired, for extra “fluff” by holding together)
- Accent Yarn (fine): For arms and legs (opt for thinner/finer thread)
- Embroidery thread or yarn scraps: For facial features (pink, black, etc.)
- Crochet Hooks:
- 6.0 mm or size appropriate for main yarn (body)
- 3.0 mm for arms & legs (thinner yarn)
- Yarn Needle: For sewing and embroidery
- Stuffing: Polyester fiberfill
- Scissors
- Optional: Craft Glue (to secure yarn ends, if desired)
- Tweezers: For stuffing and finishing small parts
- Stitch Marker: Recommended for rounds
Abbreviations (US Crochet Terms)
| Abbreviation | Meaning |
|---|---|
| MR | Magic Ring |
| sc | Single Crochet |
| inc | Increase (2 sc in same stitch) |
| dec | Decrease (single crochet two together) |
| sl st | Slip Stitch |
| ch | Chain |
| BLO | Back Loop Only |
| st(s) | Stitch(es) |
Special Notes
- The body is worked in the round (spiral) unless otherwise stated.
- Use a stitch marker to track the start of each round.
- Arms and legs are chains joined directly onto the body.
- For a more marshmallow-like appearance, combine one strand of fluffy yarn with regular yarn.
- Use BLO when instructed for best “side seam”/edge definition.
BODY
1. Start With Magic Ring
Round 1:
- Make a magic ring (MR).
- 6 sc into ring (6 sts).
- Pull ring tight.
Round 2:
- Inc in each st around (2 sc in each st) (12 sts).
- [Tip: Chain 1 at the start; do the first sc in the base of the ch-1 for a neater join.]
- Sl st in first sc to join.

Round 3:
- BLO: Work this round in the back loop only.
- Sc in each st around (12 sts).
- Sl st in first sc to join.
Round 4–6:
- Sc in both loops in each st around (12 sts per round).
- [Total: 3 rounds, forming the sides.]
- Continue to sl st at the end of each round.
Round 7:
- BLO: Work this round in the back loop only.
- (Dec) 6 times around (6 sts total).
- [Dec: Insert hook under BLO of next st, yarn over and pull up a loop, repeat for next st (two BLOs on hook), yarn over and pull through all 3 loops.]
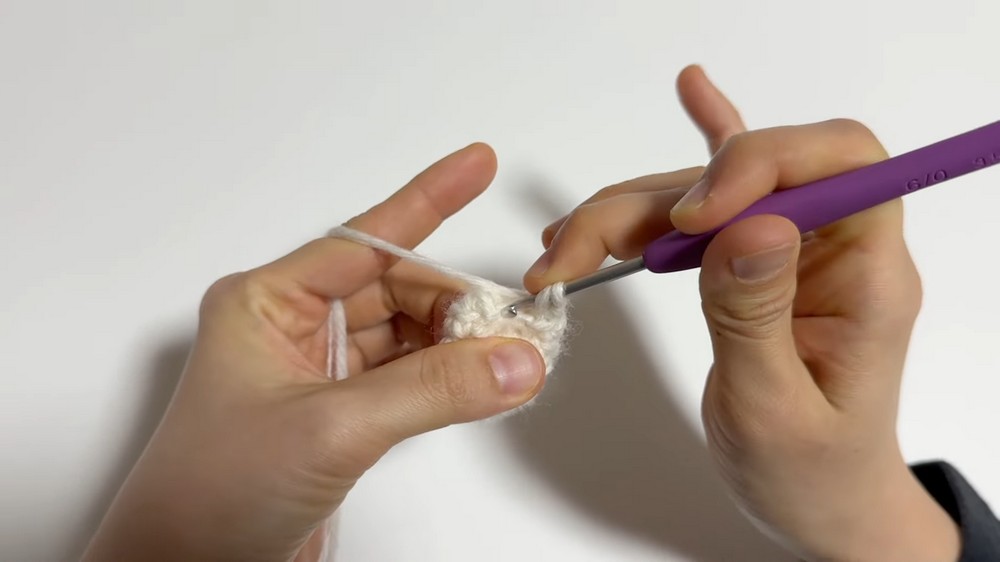
Stuff firmly with fiberfill before the opening gets too small.
Close:
- Cut yarn, leaving a long tail.
- Thread yarn needle, weave through remaining BLO of 6 sts, pull tight to close.
- Secure and hide the end inside the body.
ARMS & LEGS
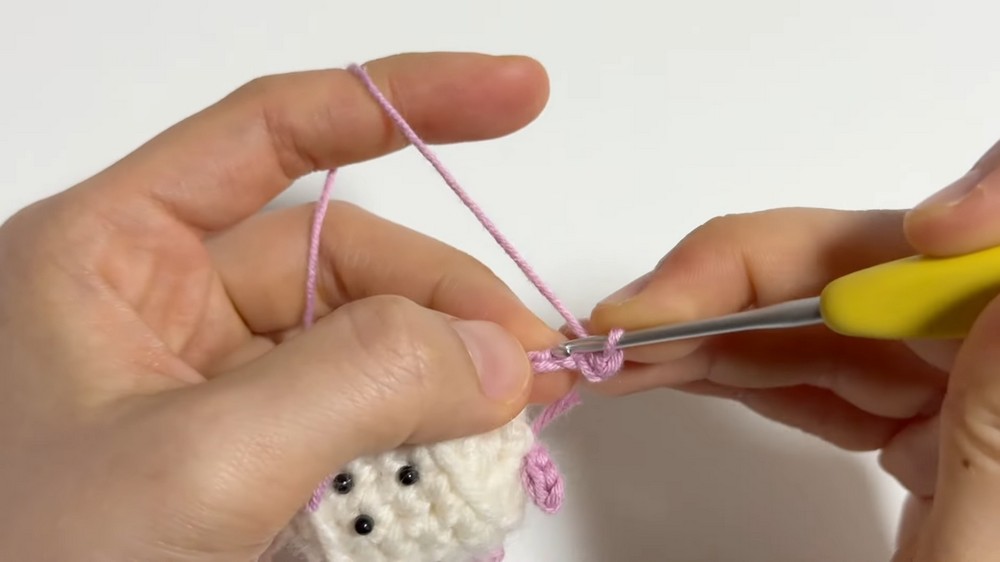
Arms and legs are worked with a thinner yarn and smaller hook, attached via direct joining—no separate pieces needed.
Position:
- Attach arms between rounds 2 and 3 (sides), legs at the bottom corners.
Arm (Make 2, both sides)
- Attach thin yarn and hook where you want arm placement.
- Ch 4 for the arm length (adjust if you want longer/shorter arms).
- Sl st in 2nd ch from hook, then in next two chains back toward body (you'll have 3 sl sts along chain).
- Insert hook into next st on body, make a sl st to secure.
- Fasten off and weave in ends, hiding them inside the body.
Leg (Make 2, at base)
- Attach thin yarn and hook at desired foot placement.
- Ch 4 (or more/less for longer/shorter legs).
- Sl st in 2nd ch from hook, then in next two chains back toward body.
- Insert hook into next st on base, sl st to secure.
- Fasten off, tie securely, and hide ends.
FACE EMBROIDERY
- Nose/Mouth:
- With embroidery thread or yarn, place the nose and mouth between rounds 1 and 2 of the body.
- For the nose: A small horizontal stitch.
- For the mouth: Small vertical or V shape just beneath the nose.
- Eyes:
- Place above the nose, spaced evenly.
- Use French knots or horizontal stitches.
- Blush/Cheeks (optional):
- Embroider or use a tiny dab of pink yarn.
Assembly & Finishing
- Adjust stuffed body to a "marshmallow" shape by rolling gently.
- Arms and legs are “free” for playful, adjustable posing.
- If any yarn ends emerge, tuck or glue inside.
- Shape with fingers for the cutest marshmallow “pillowy” look.
Conclusion
You have completed your marshmallow cat! This soft and squishy character will delight as a plush toy, charm, desk buddy, or pillow. Adjust the size, color, and arm/leg length to create endless variations.
Pattern Corrections & Tips
- When working with fluffy or hairy yarn, keep stitches tight so stuffing doesn't show.
- Attach arms and legs securely to hold up to play.
- Use BLO (back loop only) for rounds as instructed to create crisp edges.
- If you want the cat to be even fluffier, use two strands of yarn together.
- For face placement, keep features relatively low and close—this increases cuteness!
- Hide and secure all yarn ends well for a clean finish.