
Adorable Free Crochet Baby Hedgehog Pattern Anyone Can Follow
Snuggle up with this adorable Crochet Baby Hedgehog Pattern that’s easy to follow and perfect for charming nursery décor or thoughtful gifts.
There’s something heartwarming about small, handmade creations that carry both character and charm, and this baby hedgehog perfectly embodies that. With its tiny round body, textured spikes, and irresistible expression, this crochet hedgehog project is a delightful way to practice and expand your skillset while creating something meaningful.
Quick Free Crochet Baby Hedgehog Pattern Anyone Can Follow
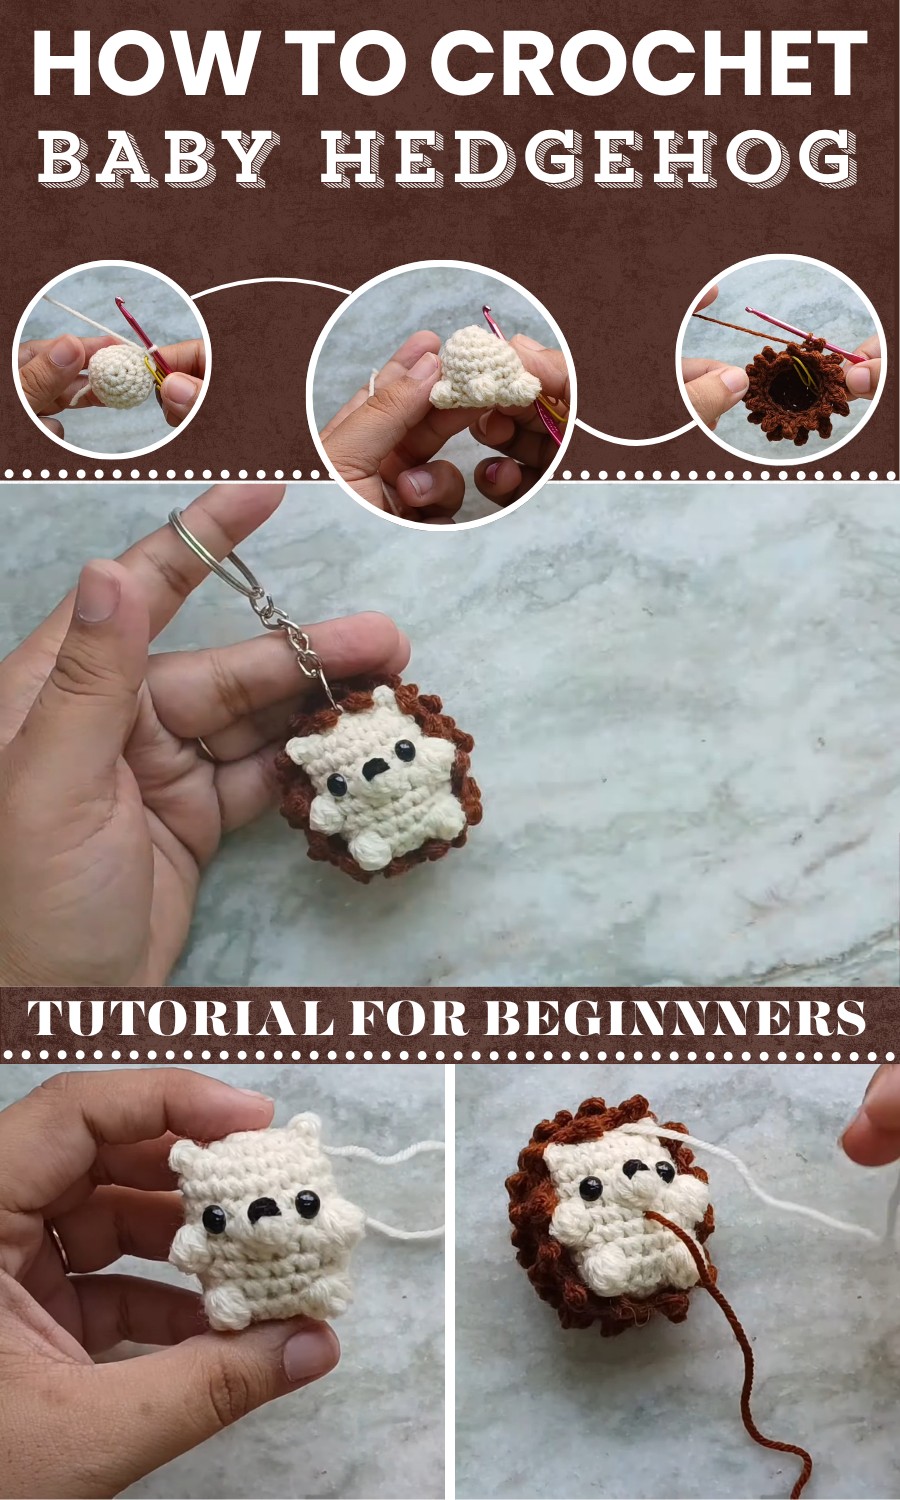
Its compact design not only makes it easy to complete but also makes it a versatile creation—perfect for gifting, decorating shelves, or even turning into a playful keychain.
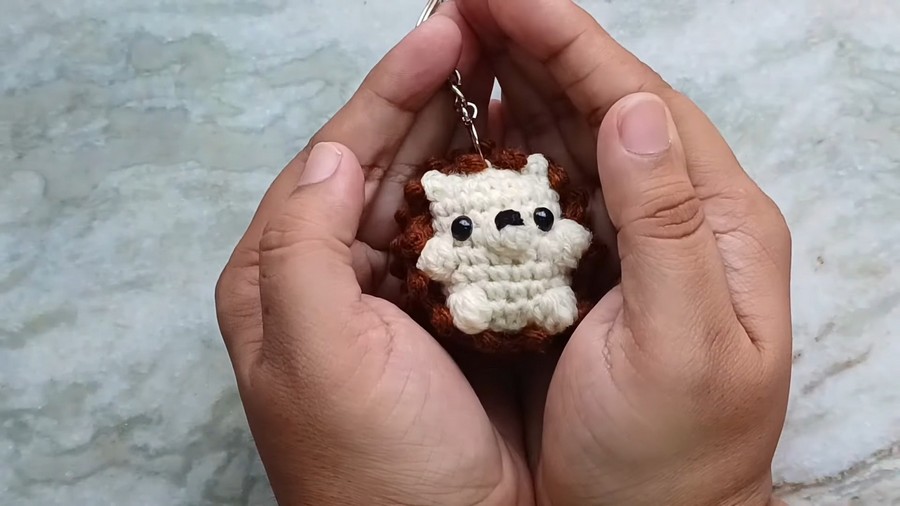
Free Crochet Baby Hedgehog Pattern
Finished Size
When following the specified hook size and yarn weight, the finished amigurumi is approximately 3.5 to 4 inches tall (9 - 10 cm).
Materials
You will need the following items:
- Yarn:
- Beige yarn (for the body, ears, arms, and legs).
- Brown yarn (for the spikes).
- Small amount of black yarn (for embroidering the nose).
- Hook: Size 3 mm crochet hook (smaller than recommended for yarn to maintain tight stitches).
- 4 mm Safety Eyes (Pair).
- Keychain ring or blank keyring (optional for keychain customization).
- Stuffing: Polyester fiberfill or similar stuffing for amigurumi.
- Yarn Needle (for weaving ends and embroidery).
- Stitch Marker or Paperclip (to mark stitches in continuous rounds).
- Scissors.
Gauge
Gauge is not critical for this pattern. However, ensure your stitches are tight to prevent stuffing from showing through the fabric.
Abbreviations Used (U.S. Terminology)
- ch: Chain
- sc: Single crochet
- st(s): Stitch(es)
- inc: Increase (2 single crochets in the same stitch)
- dec: Decrease (Invisible decrease, working into front loops only)
- sl st: Slip stitch
- yo: Yarn over
Special Techniques
Magic Circle
To start working in the round, wrap the yarn around your fingers to form a loop. Insert the hook under the loop, yo, and pull through. Chain 1, then proceed to crochet into the loop as described in the pattern. Pull gently on the yarn tail to cinch the circle closed.
Invisible Decrease
- Insert hook into the front loop of the first stitch.
- Without yarning over, insert the hook into the front loop of the next stitch.
- Yo, pull through the two front loops on the hook (2 loops now on hook).
- Yo and pull through the two remaining loops on the hook.
Bobble Stitch (for the nose and appendages)
- Yo, insert hook into stitch, pull up a loop (3 loops on hook).
- Yo and pull through 2 loops (2 loops remain).
- Repeat step 1 four more times in the same stitch, leaving one loop from each pull on the hook.
- You will have six loops on the hook. Yo and pull through all six loops.
Hedgehog Amigurumi Pattern
Body
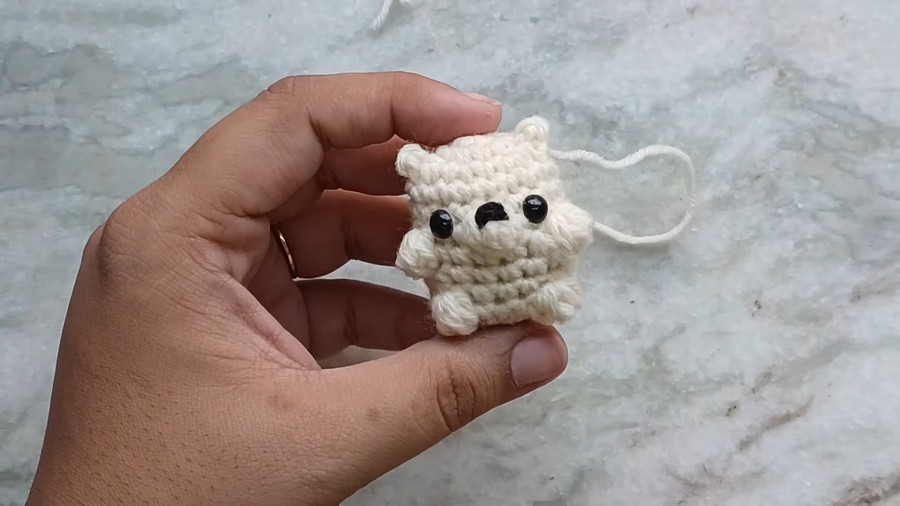
- Round 1: Start with beige yarn. Make a magic circle. Ch 1 (does not count as a stitch). Crochet 6 sc into the circle. Pull the tail to close it tight. (6 sts)
- Round 2: Inc in each stitch around. (12 sts)
- Round 3: [1 sc, inc] repeat 6 times around. (18 sts)
- Round 4-5: Sc in each st around. (18 sts)
- Round 6 (Nose):
- Sc in the first 9 sts.
- Work a bobble stitch in the 10th st (refer to the special technique section).
- Sc in the remaining 8 sts. (18 sts)
- Round 7 (Arms):
- Sc in the first 6 sts.
- Work a bobble stitch in the 7th st.
- Sc in the next 5 sts.
- Find the bobble stitch from round 6 and sc in that stitch.
- Work a bobble stitch in the next st.
- Sc in the remaining 5 sts. (18 sts)
- Round 8-9: Sc in each st around. (18 sts)
- Round 10 (Legs):
- Sc in the first 8 sts.
- Work a bobble stitch in the 9th st.
- Sc in the next 3 stitches.
- Work a bobble stitch in the next st.
- Sc in the last 5 sts. (18 sts)
- Round 11: [1 sc, 1 dec] repeat around. (12 sts)
- Stuff the body firmly at this point.
- Round 12: Dec in each st around. (6 sts)
- Cut the yarn, leaving a long tail. Use a yarn needle to weave the tail through the front loops of the last round and pull tightly to close the hole. Fasten off.
Ears
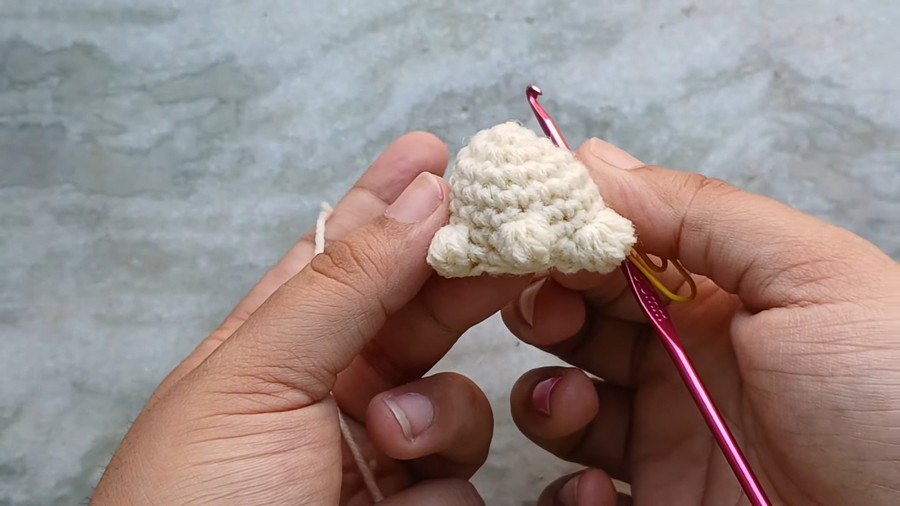
- With beige yarn, attach yarn with a sl st in between rounds 3 and 4, aligned with the eyes.
- Ch 2.
- Sl st in the 2nd chain from the hook and sl st into the adjacent stitch between rounds 3 and 4.
- Fasten off and bring the yarn tail inside the hedgehog to secure.
- Repeat for the other ear, aligning it on the opposite side.
Spikes (Back Section)
- With brown yarn, make a magic circle.
- Round 1: Ch 1. 6 sc into the circle. (6 sts)
- Round 2: Inc in each st, working in back loops only (BLO). (12 sts)
- Round 3: [1 sc, 1 inc], repeat 6 times, working in BLO. (18 sts)
- Round 4: [2 sc, 1 inc], repeat 6 times, working in BLO. (24 sts)
- Round 5-8: Sc in each st around, working BLO to form a solid dome. (24 sts)
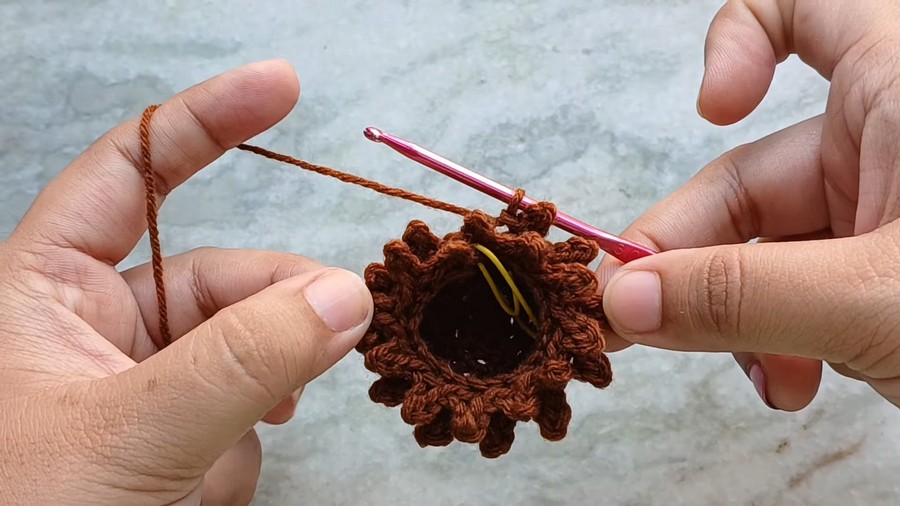
Spikes Border
- Row 1: Chain 3.
- Turn and sl st in the 2nd chain from the hook and next ch.
- Skip 1 st in the base of the last round and sl st into the 2nd stitch. This creates your first spike.
- Repeat this process (ch 3, work spike, skip st, sl st to secure) in every second stitch for a full round.
- From Row 2 onward (forming staggered spikes):
- To stagger, start by skipping 2 stitches before attaching the first spike of the row.
- Repeat the same spike-making process but be mindful to alternate and stagger the spikes with each row.
- Continue until there are no more front loops to work with. To finish, weave in the ends neatly.
Assembly
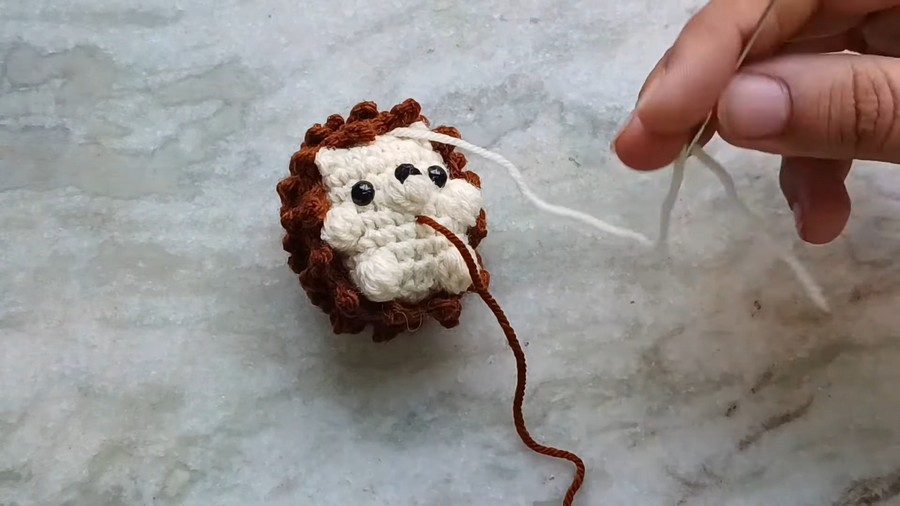
- Attach the spikes: Align the body with the center back opening of the spike layer. Use the long tail to sew the body to the brown spike section securely.
- Attach the keyring: Insert a keyring or chain through the top and sew securely using the tail from the body.
- Embroider the nose: Use black yarn to embroider a small oval nose centered over the bobble stitch. Tie a knot inside the body and hide the ends.
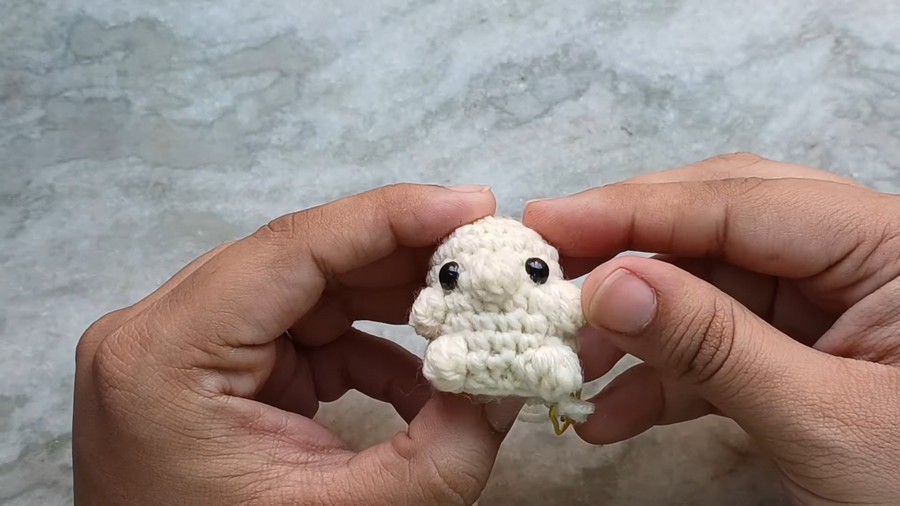
- Attach the safety eyes: Insert 4 mm safety eyes between rounds 5 and 6 of the body, spacing 1 stitch away from the nose for each eye. Secure the backs.
Tips & Customization
- Experiment with different colors for the body and spikes to make unique hedgehogs.
- Make the spikes fluffier by adding longer "chain loops" (e.g., ch 4 instead of ch 3).
- Add small accessories like a bow or scarf for seasonal variations or additional cuteness.
Conclusion
Congratulations on completing this no-sew Hedgehog Amigurumi! Perfect as a keychain, toy, or gift, this project is suitable for beginners wanting to explore adorable yet simple amigurumi designs.