
Elegant Crochet Tiara Pattern Turns Playtime into Royal Fun
Crown every special moment with charm using this Free Crochet Tiara Pattern, perfect for birthdays, dress-up fun, and keepsake memories.
Every celebration feels brighter when there’s a little sparkle added to the moment, and nothing captures that charm quite like a delicate tiara. Worn throughout history as a symbol of elegance and joy, it carries a sense of whimsy that appeals to both children and adults alike. The Free Crochet Tiara Pattern brings this treasured accessory into a handmade form that is lightweight, soft, and comfortable enough for hours of wear. Perfect for birthdays, themed parties, playful afternoons, or even keepsake photo sessions, it offers versatility with every stitch.
How Crochet Tiara Pattern Adds Grace to Special Occasions
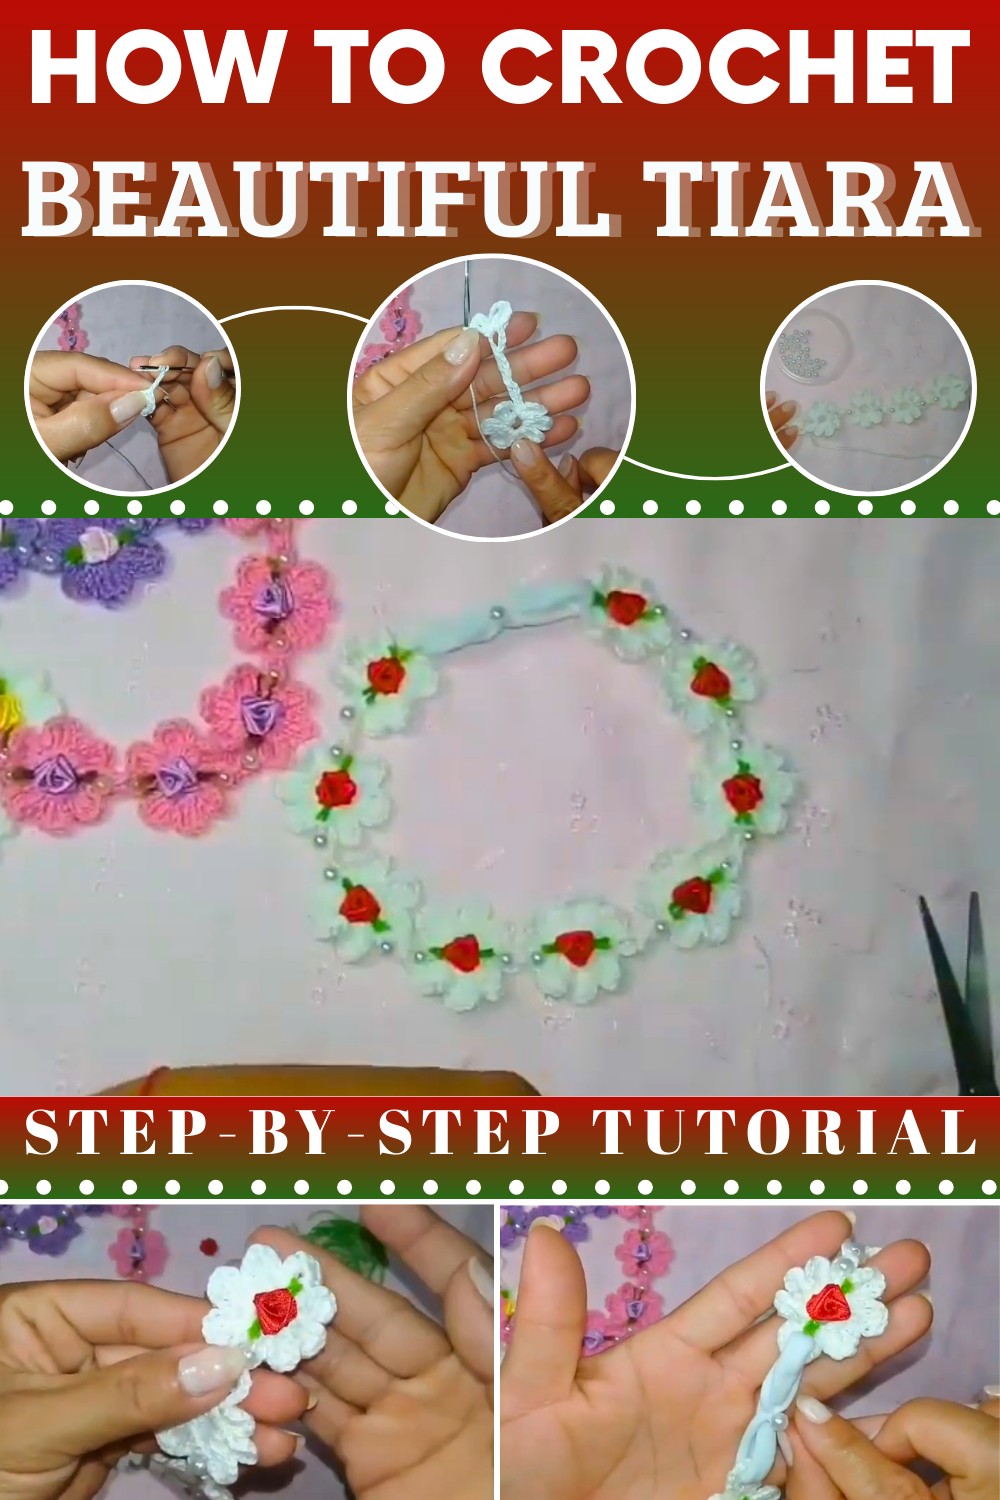
Its charm lies not only in its beauty but also in its practicality, unlike store-bought tiaras, it can be reused, customized, and treasured for years. Personal touches such as beads, sequins, or unique color choices add to its individuality, making each tiara one of a kind.
This pattern also offers the joy of gifting something meaningful, a token of love that holds both style and sentiment. Whether given to a child who adores dress-up, or kept as a cherished family accessory, it becomes a lasting reminder of special moments. The Free Crochet Tiara Pattern is a graceful way to share joy while adding timeless elegance to everyday life.

Special Features of the Tiara
- Delicate Appearance: The tiara has elegant floral and pearl accents, making it a beautiful accessory for babies or special occasions.
- Customizable: You can modify the design by using silk thread, adjusting the size, or incorporating ribbons, elastics, or pearls.
- Minimal Materials: The project requires very little in terms of supplies, which makes it cost-effective and beginner-friendly.
- Versatile Use: It can be worn as a baby accessory, used as a decoration, or made into a gift.
Materials Needed
- Anne Pearls Thread (#53): The primary thread suggested for making the tiara.
- Felt (Optional): For finishing touches and reinforcing the structure.
- Hot Glue: Used for securely attaching details like the flowers or felt.
- Scissors: For cutting thread and other materials.
- Crochet Hook (1.75mm): To work the stitches.
- Pearls: Size 5 pearls for decoration, and size 8 pearls for the flower centers.
- Elastic and/or Ribbon: For making the tiara adjustable and wearable. Ribbon #2 requires about 50 cm.
- Silk Thread (Optional): To give the tiara a softer texture.
Step-by-Step Instructions
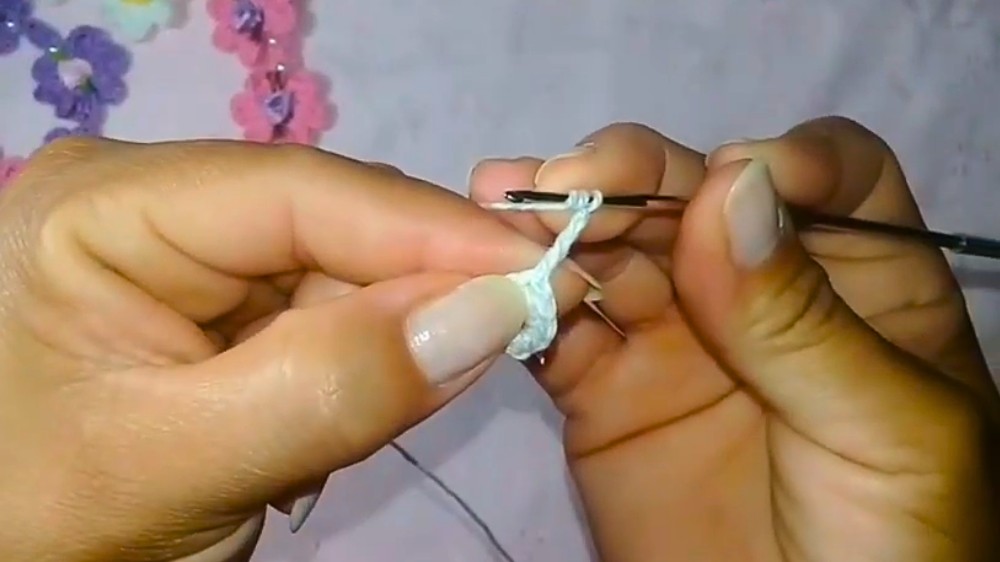
1. Begin with the Base
- Start by inserting the crochet hook and making a foundation chain of 6 stitches.
- Connect the stitches into a circle with a slip stitch, creating the base loop.
- Fill the loop with 12 single crochet stitches and finish with another slip stitch to close the base.
2. Create the First Flower
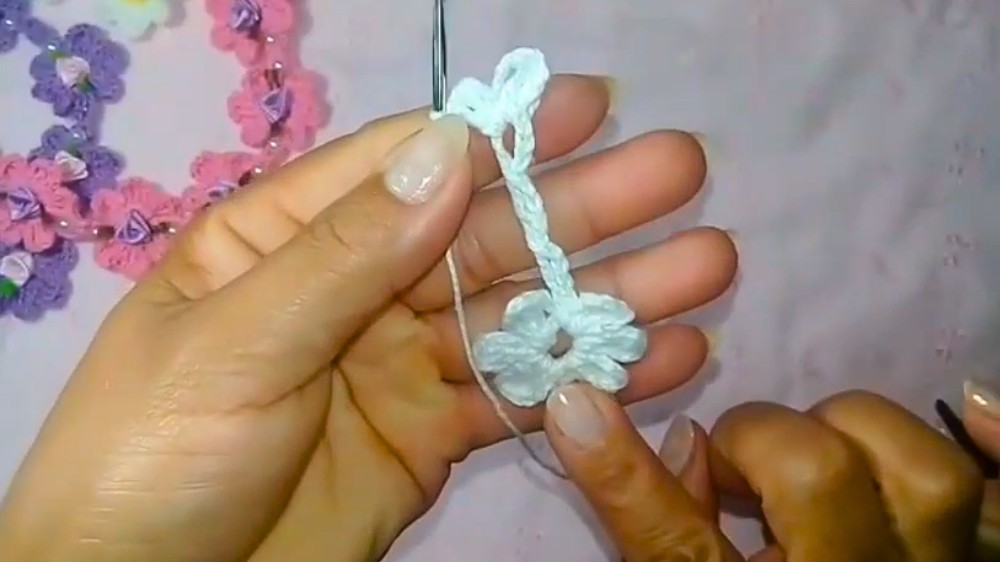
- Chain 4 stitches to begin the first flower.
- Wrap the thread around the needle twice and make a double crochet stitch.
- Repeat the process of chaining and double crochet stitches to form three petals. Each petal consists of:
- Chaining 3 stitches.
- Two double crochet stitches.
- Chaining 3 stitches and closing with a single crochet.
- Continue forming petals until your flower is complete.

3. Add More Flowers
- After finishing the first flower, create a new base ring for the next flower.
- Repeat the same process of chaining, double crochet stitches, and petal formation for each subsequent flower.
- Create as many flowers as desired (Creator made 9 flowers for the tiara shown).

4. Attach Decorative Elements
- After completing the floral tiara, attach pearls as decoration:
- Use size 5 pearls to adorn the flower's edges and size 8 pearls for the centers.
- Secure pearls with a needle and thread by sewing them into place.
- The design can also be customized by replacing pearls with silk threads or leaving the flowers plain.
5. Finish the Edges
- Cut felt pieces into rounded squares (around 2.5 cm wide) to add strength and neatly cover the back of the flowers.
- Use hot glue to attach the felt pieces to the back of the tiara, ensuring a smooth finish.

6. Attach Elastic or Ribbon
- Depending on your preference, attach an elastic band or a 50 cm ribbon to the ends of the tiara.
- Sew the ends securely with the needle and thread. Optionally, use ribbon to add a bow for extra flair.
Level of Difficulty
- Skill Level: Beginner-Friendly
Creator emphasizes that this tiara is simple to make, especially for those familiar with basic crochet techniques. The process is repetitive and does not require any advanced stitches.
Tutor's Suggestions
- Creator recommends Anne Pearls thread for a delicate and more refined finish but mentions that silk thread can also be used for a softer texture.
- When attaching pearls, ensure they are evenly spaced to maintain uniformity throughout the tiara.
- The project can be customized in multiple ways, such as using different numbers of flowers for varying lengths and sizes.
Uses of the Tiara
- Baby Accessory: Perfect for babies due to its gentle and delicate design.
- Gift Idea: Makes a thoughtful, handmade gift for birthdays, baby showers, or special occasions.
- Business Opportunity: A quick and affordable project to make and sell for some extra income.
- Decorative Piece: Can be used to embellish a nursery or photo frames.
Tip for Success
To ensure durability and a professional finish, use felt strips and hot glue for backing each flower. This will not only reinforce the tiara but also make it more comfortable to wear.
Conclusion
This tutorial shows how simple materials and a little creativity can turn into a beautiful and functional accessory. With an easy-to-follow process and opportunities for customization, this project is ideal for beginners and experienced crocheters alike. Whether you create the tiara as a gift, for sale, or for personal use, its charm and elegance are sure to impress.