
Handmade Free Crochet Sheep Keychain Pattern For Purses & Gifts
Turn everyday accessories into something adorable using the Crochet Sheep Keychain Pattern you can tab onto keys, purses, backpacks, or gift bags.
Sheep have long been cherished symbols of serenity and warmth, and what better way to carry that charm with you than through a delightful and practical handmade keychain? This Crochet Sheep Keychain Pattern brings a touch of whimsy to your daily routine. Whether it’s attached to your keys, adorning a handbag, or even decorating your refrigerator as a magnet, this crochet creation radiates charm while showcasing incredible versatility. Additionally, it offers an eco-friendly twist by incorporating recycled soda can tabs into its design—turning ordinary waste into something beautiful and functional.
Adorable Free Crochet Sheep Keychain Pattern For Fun
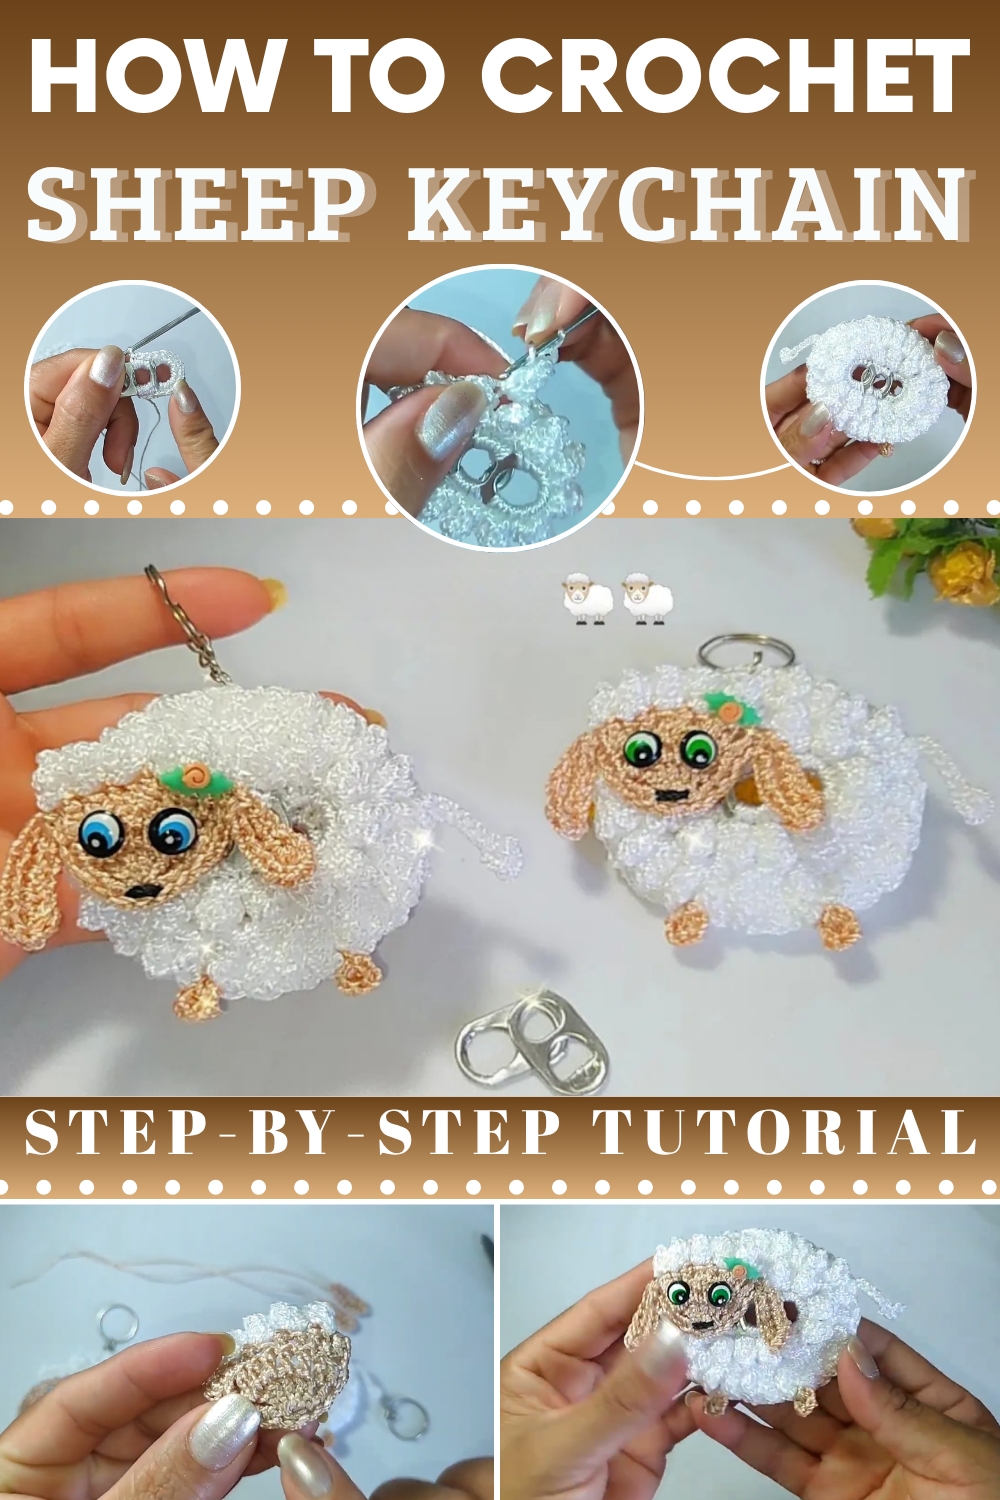
Far more than just an ornament, this keychain can brighten up your day with its quirky charm, making it a heartwarming gift for loved ones or a unique addition to your collection. Compact yet intricate, it embodies a perfect blend of artistry, resourcefulness, and functionality. Adding this sheep keychain to your daily essentials celebrates creativity while championing sustainability, proof that even the smallest touches can weave beauty into the fabric of everyday life.

Free Crochet Sheep Keychain Pattern
Finished Size
The finished sheep measures approximately 4-5 inches (10-12 cm) depending on yarn tension and hook size.
Materials
Yarn
- Thick Silk Thread (Tex 288, 100% polypropylene).
- Sheep Body Color: White.
- Head Color: Beige or Light Brown.
- Ear Color: Same as the head (beige).
- Decorative Embroidery or Mouth Yarn: Black.
Additional Supplies
- Soda Can Tabs: 4 tabs (cleaned and smoothed to prevent injuries).
- Crochet Hook: 1.75 mm.
- Scissors
- Polyester Stuffing: A small amount for shaping the head.
- Sewing Needle: For finishing and embroidery.
- Magnet/Keyring: Optional, for making the sheep functional.
- Pliers (Optional): To smooth out rough edges on the tabs.
Gauge
Gauge is not essential for this project. However, ensure tight stitches to prevent visible gaps between stitches.
Skill Level
Intermediate Crochet – Basic crochet stitches, working in rounds, and assembling components are required.
Key Abbreviations (US Terms)
- ch: Chain
- sc: Single crochet
- sl st: Slip stitch
- hdc: Half double crochet
- dc: Double crochet
- popcorn st: Popcorn stitch (5 dc, remove loop, insert hook into first dc, pull the loop through to close).
- inc: Increase (2 sc/dc per stitch)
- dec: Decrease (crochet next 2 stitches together)
- yo: Yarn over
- […]: Repeat instructions within brackets as specified
Pattern Instructions
Step 1: Preparing the Soda Can Tabs
Preparation
- Smooth the rough edges on the tabs using pliers.
- Work on 2 pairs of tabs; each pair requires one burr (seal) removed.
- Ensure clean tabs ready for crochet attachment.
Step 2: Tab Covers
Covering the Tabs
- Foundation:
- Insert your hook into the middle hole of a soda tab. Secure the yarn with slip stitch and ch 1.
- Round 1:
- Work 3 sc in the middle hole of the tab.
- Move to the curve and work 10 sc evenly around the edge.
- At the bottom opening, repeat 3 sc.
- Continue to the opposite curve with 10 sc.
- Join with a sl st at the beginning.
- Round 2: Popcorn Stitch Edge
- Ch 3 (counts as the first dc).
- Work 4 dc into the same stitch, remove the loop, insert your hook into the first dc of the group, pull the loop through, and close the popcorn stitch. Ch 1 to separate.
- Skip next space and repeat popcorn stitch all around.
- Result:
- Each tab will have a crochet-lined edge and decorative popcorn stitches.

Step 3: Sheep's Body Assembly
Joining Tabs
- Take two prepped tabs and sew them together along the edges with white yarn.
- Insert stuffing lightly inside before fully closing.
- Repeat for the other two tabs, forming a front and back piece.

Final Tab Joining
- Sew the front and back tab pieces together around the edges using slip stitches. Ensure even alignment.

Step 4: Sheep's Head
Foundation:
- Magic Ring:
- Crochet 6 dc into the ring and tighten it.
- Round 2:
- Inc in each st, for a total of 12 dc.
- Round 3:
- [1 dc, inc] in the next st. Repeat around. (18 dc)
- Rounds 4-9:
- Work sc in each st around. (18 sc)
- This will form the spherical shape of the head.
- Decrease Row:
- [1 sc, dec] until only 6 stitches remain.
- Finish with slip stitches, lightly stuff the head, and sew it to the top-center of the sheep's body.

Step 5: Sheep's Tail
- Magic Ring:
- Start with 7 ch.
- Shaping:
- Return down the chain with sc and sl st, finishing with 4 hdc in the curve.
- Attach the tail securely to the back of the sheep’s body.
Step 6: Sheep's Ears
Ear Pattern:
- Foundation:
- Ch 7.
- Row 1:
- Return with sc, starting in the second chain.
- Curve:
- In the last stitch, work 4 hdc to form the rounded curve.
- Row 2:
- Work sc into each sc, finishing with a sl st.
- Sew ears to either side of the sheep's head using beige yarn.
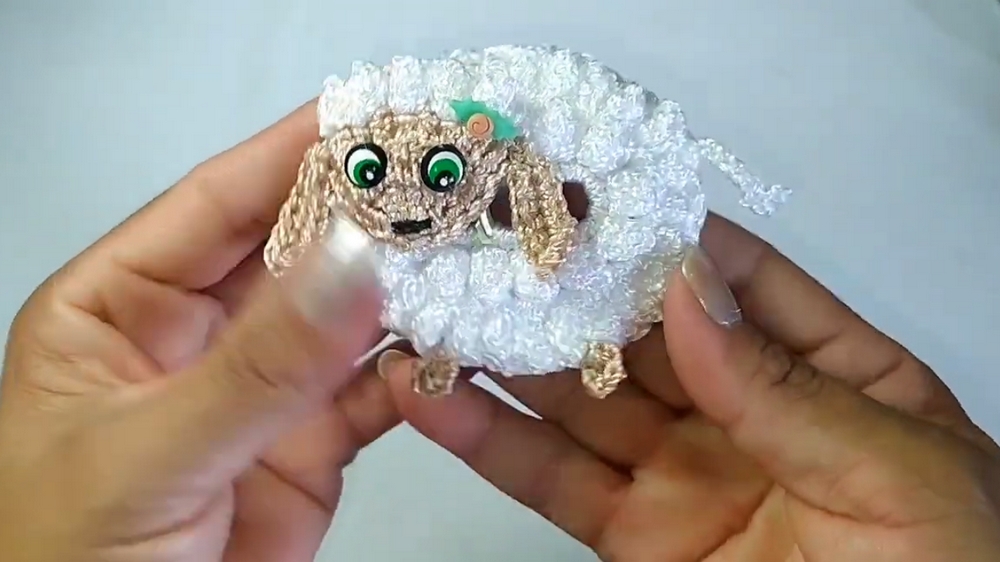
Step 7: Mouth and Embellishments
- Embroidery:
- Use black yarn to embroider a small mouth shape below the head’s center.
- Optional Decorations:
- Add pearls, ribbons, or flowers for customization.
- Attach a magnet or keyring as desired.
Finishing
Trim excess yarn tails and weave them securely into the work. Check all joins (ears, head, and body) for stability, especially any attached accessories.
Customization Ideas
- Colors: Use pastel shades for a softer look or bold colors for a more playful design.
- Applications: Convert the sheep into appliques for bags, fridge magnets, or hanging ornaments.
- Advanced Details: Add small crocheted flowers, clouds, or grass motifs around the sheep for themed designs.
Special Techniques
- Popcorn Stitch: Creates a textured look for the sheep’s body.
- Invisible Decrease: Recommended for shaping the sheep’s head and tail.
Conclusion
Congratulations on creating a charming crochet sheep using recycled soda can tabs! This project combines creativity, sustainability, and fun crochet techniques to produce an adorable piece for gifting, selling, or personal use.
Use this design as inspiration to create other animals or designs with soda tabs. Add custom elements and experiment with colors for unique results.
Important Remarks
- The sheep design is sturdy enough to endure light handling but ensure tight stitches for durability.
- When selling, price the piece between 15-20 reais as recommended.