
Free Crochet Amigurumi Reindeer Pattern For A Cute Christmas Gift
Decorate your Christmas corner with the Crochet Amigurumi Reindeer Free Pattern, a charming little animal that adds a cheerful seasonal touch.
This tiny toy feels very friendly and has a soft, gentle personality. The Crochet Amigurumi Reindeer is a delightful little piece that looks like a small reindeer with charming features. Its size is usually betwe en 5 to 7 inches, which makes it easy to hold or display anywhere.
Easy Crochet Amigurumi Reindeer Free Pattern For A Cheerful Winter Toy
Its shape is simple but very appealing. The body is round, and the head is a bit bigger, giving it a cute, childlike appearance. Short legs and arms add to its charm, while small antlers stand out on top of the head. The face often has two black eyes and a small nose, sometimes with a slight smile, making the reindeer look warm and welcoming.
The design by Crochet con May uses basic shapes such as spheres and tubes, so it is suitable for those beginning to work with amigurumi but with some experience. It is classified as beginner to intermediate because it helps practice making rounds, stuffing parts, and sewing pieces together correctly.
Colors can be traditional, like browns and reds, or more creative, allowing a personal touch. Its small and soft form makes it a nice decoration or a little gift, especially during festive seasons.
Overall, this Crochet Amigurumi Reindeer is a fun project that is not too difficult and fits well for those developing their crochet skills.
About the Pattern
This amigurumi reindeer named Matías features classic shaping, playful color changes, and charming details that result in a festive plush ideal for holiday décor or gifting. Matías is crocheted in continuous rounds to achieve a seamless body, then completed with simple but expressive appendages, antlers, and facial features. The pattern is designed to be accessible to intermediate beginners who are comfortable with basic amigurumi techniques.

Pattern at a Glance
Pattern Type: Amigurumi – Reindeer
Main Technique: Crocheting in spiral rounds
Main Features: Shaped body, striped color changes, simple limbs, expressive details
Final Overall Height: Approximately 15–18 cm (depending on yarn and tension)
Important Notes
- This pattern uses US crochet terminology.
- Do not join rounds; work in a spiral unless otherwise stated.
- Use stitch markers to keep track of your first stitch.
- Stuff each part as you go for smoother shaping.
- All color changes are worked by finishing the previous stitch with the new color.
Difficulty Level
Confident Beginner to Intermediate – Familiarity with magic ring, increases, decreases, and color changes is required. The details are simple and assembly is straightforward.
Supplies Needed
- Worsted or DK weight yarn in:
- Main color (brown or tan)
- White
- Red
- Accent color for details (optional: black for embroidery)
- Crochet hook to match yarn (typically 2.5mm–3.5mm)
- Yarn needle
- Fiberfill stuffing
- Stitch marker
- Scissors
- Blush (or pink pastel) for cheeks
Size & Measurements
- When made with a 2.5mm hook and DK yarn, Matías measures approximately 16–18 cm tall.
- Size may vary depending on yarn thickness and individual tension.
Gauge & Stitch Details
- Gauge is not crucial, but stitches should be tight and uniform to prevent stuffing from showing.
- 6 sc x 6 rounds = 2.5 cm x 2.5 cm square (approximate for reference).
Crochet Abbreviations
| Abbreviation | Meaning |
|---|---|
| sc | single crochet |
| inc | increase (2 sc in one st) |
| dec | decrease (sc2tog) |
| MR | magic ring |
| st(s) | stitch(es) |
Special Stitch Guide
- Magic Ring (MR): Form a loop, crochet stitches into the ring, then pull tight.
- Increase (inc): 2 single crochets in the same stitch.
- Decrease (dec): Single crochet two stitches together (invisible decrease if preferred).
- Color Change: Work last yarn over of stitch in new color.
Complete Crochet Pattern
Body
1 Round :
- Magic Ring, 6 sc into ring (6 sts)
2 Round :
- 6 inc (2 sc in each st) (12 sts)

3 Round :
- (1 sc, 1 inc) x6 (18 sts)
4 Round :
- (2 sc, 1 inc) x6 (24 sts)
5 Round :
- (3 sc, 1 inc) x6 (30 sts)
6 Round :
- (4 sc, 1 inc) x6 (36 sts)
7 Round :
- (5 sc, 1 inc) x6 (42 sts)
Rounds 8–18 (11 rounds):
- sc in each st (42 sts per round)
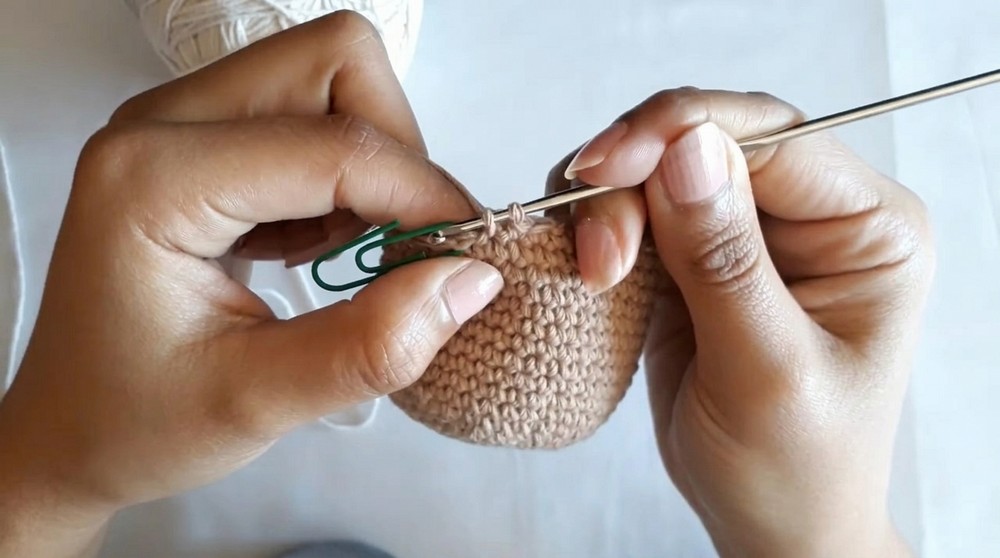
Color Change Sequence (Neck Section):
- Start at Round 19:
- 2 rounds white
- 2 rounds red
- Repeat: Alternate these pairs until desired length of neck is reached (usually 3 pairs, 6 rounds total).

Decreasing for Closure:
20 Round :
- (5 sc, 1 dec) x6 (36 sts)
21 Round :
- (4 sc, 1 dec) x6 (30 sts)
22 Round :
- (3 sc, 1 dec) x6 (24 sts)
23 Round :
- (2 sc, 1 dec) x6 (18 sts)
Round 24:
- (1 sc, 1 dec) x6 (12 sts)
Round 25:
- 6 dec (Close opening, fasten off, weave end)
Legs (Make 2)
Round 1:
- Magic Ring, 6 sc (6 sts)
Round 2:
- 6 inc (12 sts)
Rounds 3–5:
- sc in each st (12 sts per round)
Fasten off, leaving long tail for sewing. Stuff lightly.

Ears (Make 2)
Repeat rounds for legs:
- Magic Ring, 6 sc (6 sts)
- 6 inc (12 sts)
- 3 rounds sc
Do not stuff. Flatten and sew shut after assembly if desired.
Arms (Make 2)
Round 1:
- Magic Ring, 5 sc (5 sts)
Round 2:
- 5 inc (10 sts)
Rounds 3–13 (11 rounds):
- sc in each st (10 sts per round)
Fasten off, leaving long yarn tail for sewing. Stuff lightly.
Snout
Round 1:
- Magic Ring, 6 sc (6 sts)
Round 2:
- 6 inc (12 sts)
Fasten off, leaving tail for sewing. Stuff gently.
Antlers (Make 2)
- Follow the shaping as demonstrated onscreen (twisted or branched style).
- Typically worked in brown yarn; chain and sc rows can be used to form branches.
- Fasten off, leaving long tail for assembly.
Embroidery (Nose & Mouth)
- Using black thread or yarn, embroider a small nose on the snout's center.
- Stitch a simple mouth in a “V” shape below the nose.
Assembly & Finished Size
Legs:
- Sew both legs securely to the base of the body.
Arms:
- Attach arms 13 rounds down from the top of the body, on each side.
Snout:
- Sew the snout just above the first white neck stripe.
Ears:
- Attach ears at the side of the head, close to the top but angled slightly for expression.
Antlers:
- Position antlers securely at the very top of the head.
Eyes:
- Embroider small ovals or lines for eyes across two rows above the snout, spaced evenly.
Finishing Touches:
- Carefully apply blush to the cheeks for a playful look.
Completed height should be approximately 16–18 cm, depending on your yarn and crochet tension.

Conclusion
This pattern provides a structured method for crafting the amigurumi reindeer Matías, emphasizing clear rounds, color changes, and assembly for effective results. Each section is designed to balance clarity with creativity, resulting in a reindeer that is as robust as it is endearing. The straightforward construction promotes skill-building, while the decorative touches ensure a delightful finish worthy of display or gifting throughout the holiday season. Employ any color combinations or face details as desired to personalize Matías for various occasions or recipients, and enjoy the thoughtful art of creating a seasonal keepsake.