
Simple Crochet Santa Claus Free Pattern Festive Home Decor
Pick red and white yarn for this Crochet Santa Claus Free Pattern and finish a cheerful amigurumi figure for Christmas trees and festive displays.
Try this simple guide about a popular holiday decoration called Crochet Santa Claus. This item design by Hooks _On_The_Go is well liked and adds a nice touch to any room during the festive time.
Small Crochet Santa Claus Free Pattern For Christmas Presents
Crochet Santa Claus usually stands about 6 to 8 inches tall. It has a soft, round shape that feels warm and friendly. The classic red suit with white edges is easy to recognize. A small black belt is placed around the middle to add detail. The white beard is thick and fluffy, giving Santa a kind look.
Along with this, the red hat topped with a white ball and little hands often holding gifts or candy canes make the figure feel more lifelike. These details give it a strong human feel, making it a pleasant decoration or gift.
Skills needed to make this are suitable for beginners or those with some crochet experience. The basic stitches are used most of the time, so it does not feel too hard. Also, changing colors and shaping parts offer a good chance to practice and improve.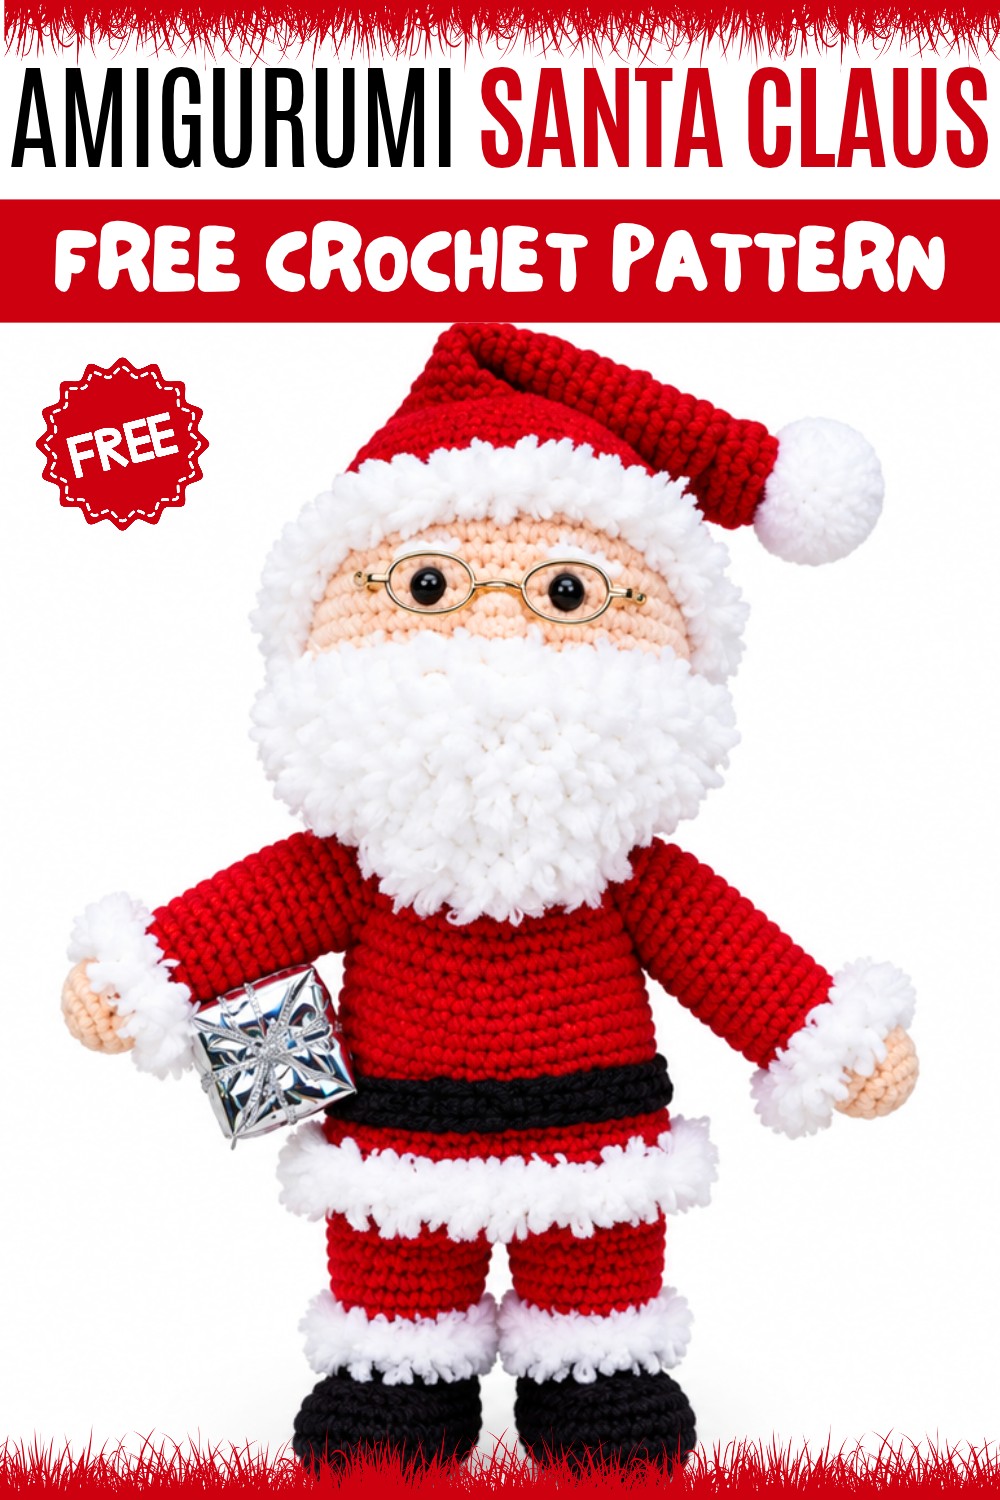
Overall, a Crochet Santa Claus is a fun holiday project that results in a charming figure. It adds a warm spirit to home settings and shows thoughtfulness when given to others.
Try making one, and brighten up your holiday season with a little Santa friend!
About the Pattern
This amigurumi Santa Claus pattern features detailed shaping and assembly instructions to create a festive, traditionally styled figure. The design incorporates all key elements: Santa’s iconic red suit, hat, boots, intricate mustache, and accessories including a belt and reading glasses for verisimilitude. The construction is modular—each body part is crocheted individually and joined for a structured, plush result. Decorative details such as color changes, white trims, and surface embellishments help create visual richness and evoke classic holiday imagery.

Pattern at a Glance
- Construction: Crocheted in rounds using amigurumi technique, with components joined during assembly.
- Color Work: Strategic color changes for realistic garments and facial features.
- Finishing Touches: Clothing trims, shoes, a full mustache, belt, and accessories are added separately and sewn or glued in place for stability.
Important Notes
- Work stitches consistently tight to avoid gaps, especially important in amigurumi to ensure robust stuffing and crisp definition between color changes.
- Use stitch markers to keep track of the beginning of each round, especially where arm and leg partitions are made.
- Round counts and color transitions must be strictly followed to ensure proper proportions and an authentic look.
- Back loop-only (BLO) and front loop-only (FLO) rounds are critical to creating the dividing lines for clothing layers and trims.
- Stuff as you work, maintaining even filling in limbs and head to avoid distortion when assembled.
Difficulty Level
Intermediate
Requires proficiency in amigurumi basics, increasing and decreasing in rounds, color changing, BLO/FLO techniques, and assembly of multi-part dolls.
Supplies Needed
- Yarn: Worsted or DK weight in red, white, black, and light pink (skin tone).
- Crochet Hook: 2.0–2.5 mm recommended for firm fabric.
- Stuffing: Polyester fiberfill.
- Safety Eyes: Suitable size for facial proportions.
- Yarn Needle: For sewing parts and weaving in ends.
- Scissors
- White Pom-pom: For hat topper.
- Thin wire or ready-made reading glasses.
- Glue: For attaching pom-pom and glasses securely.
Size & Measurements
- Santa Height: Approximately 20–25 cm, depending on yarn and tension.
- Arms & Legs: Proportioned to body, achieving classic amigurumi rounded limbs.
- Hat: Designed to fit snugly over head, finishing the iconic look.
Gauge & Stitch Details
- Gauge is not critical but keep stitches tight for structure (no stuffing should show).
- Follow stitch counts for each section to ensure correct sizing and proportions.
- Use invisible decrease for smooth shaping in limbs and body.
Crochet Abbreviations
| Abbr. | Stitch Name |
|---|---|
| ch | chain |
| sc | single crochet |
| dc | double crochet |
| hdc | half double crochet |
| inc | increase (2 sc in one stitch) |
| dec | decrease (single crochet two together) |
| BLO | back loop only |
| FLO | front loop only |
| sl st | slip stitch |
| st | stitch |
| rd | round |
Special Stitch Guide
- Magic Ring: Create an adjustable ring for starting most amigurumi parts.
- Back Loop Only (BLO): Insert hook under only the back loop of the stitch for texture and partitioning.
- Front Loop Only (FLO): Insert hook under just the front loop for surface trims or color changes.
- Invisible Decrease: Insert hook in front loops of next two sts, yarn over, draw through both loops, complete stitch as normal.
- HDC Trim: Work a round of half double crochet for a decorative finish at edges of sleeves, shirt, and hat.
Complete Crochet Pattern
Head and Body
Head (Light Pink Yarn):
- R1: Magic ring, 6 sc.
- R2–R10: Increase each round as follows:
- R2: inc in each st (12)
- R3: 1 sc, inc around (18)
- R4: 2 sc, inc around (24)
- R5: 3 sc, inc around (30)
- R6: 4 sc, inc around (36)
- R7: 5 sc, inc around (42)
- R8: 6 sc, inc around (48)
- R9: 7 sc, inc around (54)
- R10: 8 sc, inc around (60)
- R11–R20: 60 sc per round (work evenly)
- R21–R28: Decrease as follows:
- R21: 8 sc, dec around (54)
- R22: 7 sc, dec around (48)
- R23: 6 sc, dec around (42)
- R24: 5 sc, dec around (36)
- R25: 4 sc, dec around (30)
- R26: 3 sc, dec around (24)
- R27: 2 sc, dec around (18)
- R28: 18 sc. Switch to red yarn for body at last st.

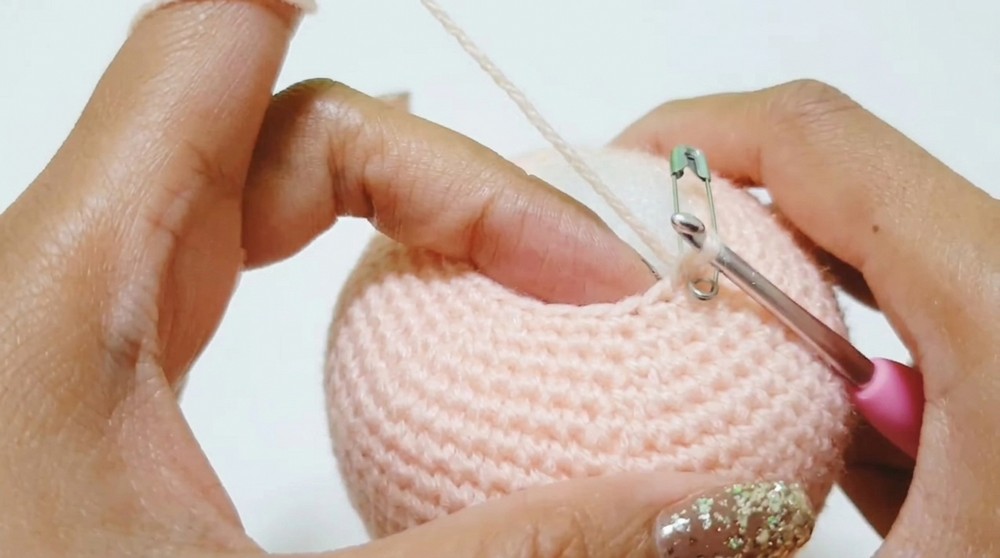
Body (Red Yarn):
- R29–R38: Increase for body bulge:
- R29: 2 sc, inc around (24)
- R30: 3 sc, inc around (30)
- R31: 4 sc, inc around (36)
- R32: 5 sc, inc around (42)
- R33: 6 sc, inc around (48)
- R34: 7 sc, inc around (54)
- R35: 8 sc, inc around (60)
- R36: 9 sc, inc around (66)
- R37: 10 sc, inc around (72)
- R38: 72 sc even

Body, Legs & Arms Partitioning
- Partition for Arms (start after main body):
- Following R38, partition off 16 stitches in each side for arm openings.
- Continue with 9 rounds for main body between arms (40 sc each round).
- R49: Work BLO (40 sc); this is for shirt/trims later.
Divide for Legs:
- Split remaining 40 sc into two halves (20 sc for each leg).
- Each Leg: Work 17 rounds of 20 sc.
Arms (Make 2)
- Using red yarn:
- Work 16 sc per round for 12 rounds.
- R13: Work in BLO for sleeve trim.
- Switch to light pink yarn:
- R14–R15: 16 sc.
- Stuff, flatten, and sew closed.
Shoes (Make 2)
- Ch 21.
- Rows 1–5: Work 20 sc each row to create sole.
- Whipstitch or sew these around each amigurumi foot base.
Clothing Details
Shirt and Sleeves
- Shirt Trim: Join white yarn to FLO of the body's matching BLO round.
- Work one round in FLO, followed by one round in both loops.
- Top with one round white HDC.
- Sleeve Trim: Repeat process by working HDC rounds onto each BLO sleeve round for consistent white cuffs.
Belt
- Ch 41.
- Work 40 sc for 2 rows.
- Sew closed to form a band and stitch in place around Santa’s waist.
Hat
- Start with red:
- Increase each round up to 60 sc for R33.
- Work 4 rounds even (60 sc).
- Finish with a round of white HDC trim.
- Attach pom-pom to tip using glue or short stitches.
Mustache
- Ch 26.
- Rows 1–2: 24 dc.
- Row 3: Skip first 7 st, then 2 sc, 6 dc, 2 sc. This provides signature mustache curl.
- Attach with yarn needle under nose/middle of face.
Assembly & Finished Size
- Firmly stuff all parts with fiberfill as you go.
- Sew head to body for a strong neck join.
- Attach arms at sides, positioning so that white cuffs are at wrist level.
- Sew both shoe soles onto each foot, matching edges securely.
- Work shirt trim in the FLO along appropriate round, and complete sleeve cuffs using HDC as noted.
- Add completed belt around Santa’s waist and securely stitch in place.
- Place hat on head, aligning seams, and attach with whipstitch or small dabs of glue. Finish with a pom-pom.
- Attach mustache evenly across the upper lip area.
- Insert safety eyes, then position and glue wire glasses just above the mustache.
- Ensure all attachments are deeply anchored, especially if item is for children.


Conclusion
Amigurumi Santa Claus is a detailed and expressive holiday centerpiece, capturing the warmth and charm of a classic Christmas icon. Thoughtful construction of parts and their careful combination render a durable, huggable décor item, while precise color changes and surface embellishments evoke festive spirit. From textured trims to the intricate mustache and hat, each detail has been considered for both sturdiness and style, making this piece a seasonal favorite that endures year after year.