
Mini Bear Free Crochet Pattern with Simple Shapes
Build sweet keepsakes easily with this free crochet mini bear pattern that's tailored for creating endearing designs suitable for all skill levels.
There is a special kind of joy that comes from bringing a tiny, huggable friend to life with just a hook and some yarn. This little amigurumi bear is the perfect project to do just that. The wonderful video tutorial from Harriet’s Crochet provides clear, simple guidance to help you complete this Free crochet Mini Bear pattern with confidence. This project results in a classic toy that is small enough to fit right in the palm of your hand, making it an incredibly endearing and satisfying piece to finish.
Free Crochet Mini Bear Pattern with Embroidered Details

The design of this miniature bear is all about timeless charm. It features a wonderfully plump body and a perfectly round head, giving it that classic teddy bear silhouette we all know and love. Its sweet, simple features, including a distinct muzzle and two little ears perched on top, give it an innocent and friendly expression. The bear’s arms and legs are proportioned perfectly to its body, adding to its overall balanced and adorable appearance. It’s a simple, uncluttered design that allows the warmth of your handmade stitches to shine through.
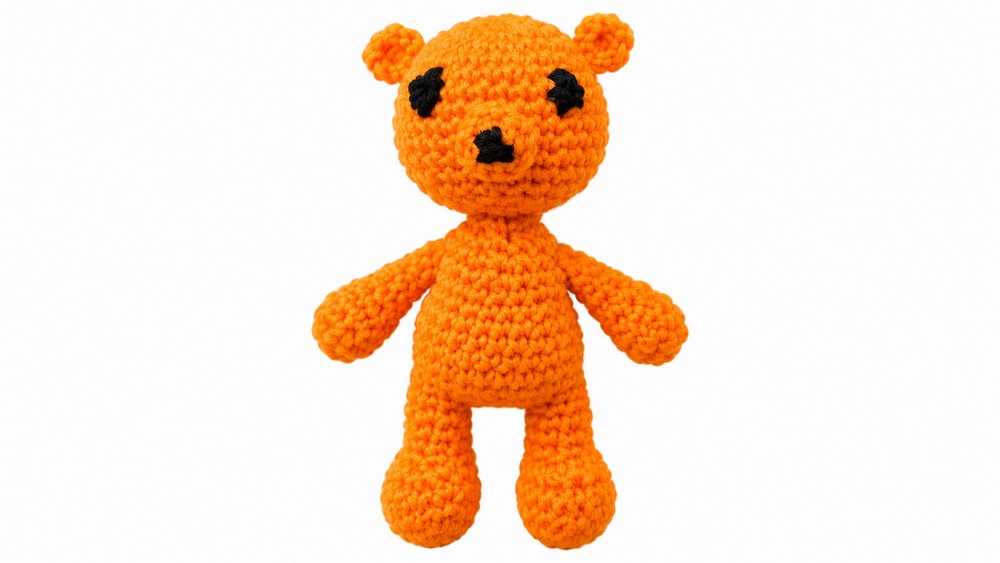
Because of its small size, this mini bear is incredibly versatile. It can easily be fitted with a loop and a metal ring to become a delightful keychain or a unique bag charm that adds a personal touch to your accessories. These bears also make fantastic decorations for a nursery, where they can be strung together for a mobile or placed on a shelf. They are, above all, the perfect handmade gift. A tiny bear is a thoughtful present for a baby shower, a birthday, or simply as a small token to let someone know you are thinking of them.
Mini-Bear Crochet Pattern
Create a cute mini-bear using single crochet (sc) stitches throughout this easy-to-follow pattern. Perfect for beginners who want a rewarding amigurumi project. Gather your yarn, hook, and stuffing—let’s begin!
Pattern Highlights
- Made entirely with single crochet (sc) stitches.
- Uses simple increases (inc) and decreases (dec) for shaping.
- Includes separate parts: head, arms, legs & body, ears, and muzzle.
- Legs are joined together with chains for a sturdy body.
- Arms are attached within the body rounds for a seamless finish.
Notes Before You Begin
- inc means 2 single crochets in the same stitch.
- dec means to single crochet two stitches together.
- Numbers in brackets [ ] indicate total stitches at the end of each round.
- Start most parts with a magic ring.
- Keep a stitch marker handy to mark the start of rounds.
- Stuff firmly before closing each part.
Skill Level
Beginner to Intermediate.
Basic knowledge of crochet fundamentals such as single crochet, magic ring, inc, and dec is needed.
Materials
- Worsted weight yarn (approx. 50-75g)
- Crochet hook (3.5mm to 4mm recommended)
- Fiberfill stuffing
- Stitch marker
- Yarn needle
- Scissors
- Optional: safety eyes or embroidery thread for facial features
Stitch Abbreviations
- sc: single crochet
- inc: increase (2 sc in same stitch)
- dec: decrease (single crochet two together)
- ch: chain
- sl st: slip stitch
- magic ring: adjustable ring to start circular rounds
Finished Size
Approximately 4-5 inches tall, depending on yarn/hook tension.
Step-by-Step Pattern
Head
Start by creating a rounded head with increasing and decreasing rounds for shaping.
- Row 1:
- 6 sc into a magic ring (6 stitches)
- Row 2:
- inc in each stitch around (12 stitches)
- Row 3:
- [ 1 sc, inc ] repeat around (18 stitches)
- Row 4:
- [ 2 sc, inc ] repeat around (24 stitches)
- Row 5:
- sc in each stitch (24 stitches)
- Row 6:
- [ 3 sc, inc ] repeat around (30 stitches)
- Rows 7 to 11:
- sc in each stitch (30 stitches per round)
- Row 12:
- [ 3 sc, dec ] repeat around (24 stitches)
- Row 13:
- [ 2 sc, dec ] repeat around (18 stitches)
- Row 14:
- [ 1 sc, dec ] repeat around (12 stitches)
- Final Row:
- dec around until 6 stitches remain; fasten off (6 stitches)
- Stuff the head firmly before closing.

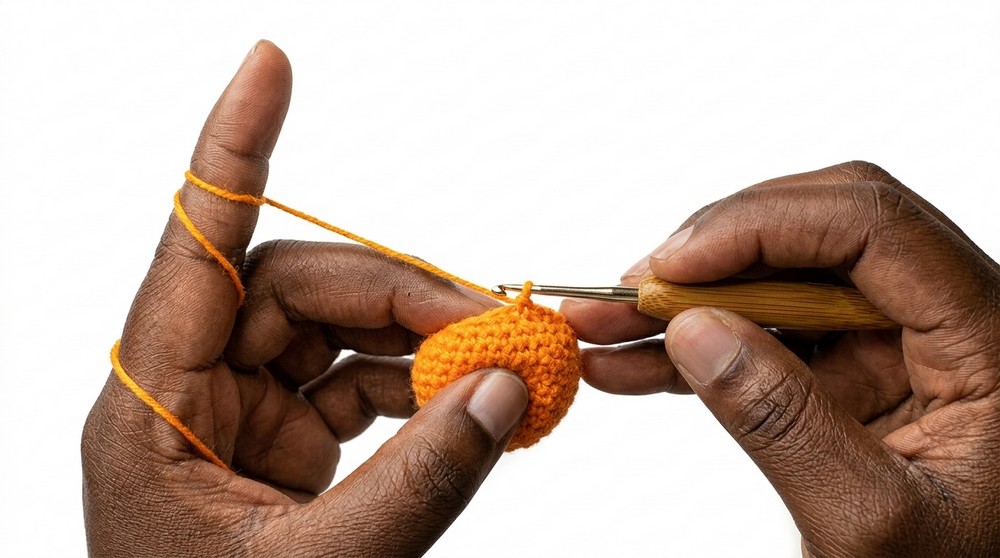
Arms
Craft small, slightly tapered arms.
- Row 1:
- 6 sc into a magic ring (6 stitches)
- Row 2:
- [ 1 sc, inc ] 3 times (9 stitches)
- Rows 3 & 4:
- sc in each stitch (9 stitches per round)
- Row 5:
- dec twice, then 5 sc (7 stitches)
- Row 6:
- dec twice, then 3 sc (5 stitches)
- Rows 7 & 8:
- sc in each stitch (5 stitches)
- Slip stitch and fasten off.
- Lightly stuff the arms before finishing.
Legs and Body
Legs
- Row 1:
- Chain 4, start in 2nd chain:
- inc (2 sc), 1 sc, 3 sc in last chain, continue other side: 1 sc, inc (2 sc) (8 stitches)
- Row 2:
- (Pattern does not specify; assume sc across 8 stitches)
- Row 3:
- 2 inc, 1 sc, 3 inc, 1 sc, inc (14 stitches)
- Row 4:
- sc in each stitch (14 stitches)
- Row 5:
- 3 sc, 4 dec, 3 sc (10 stitches)
- Row 6:
- 2 sc, 3 dec, 2 sc (7 stitches)
- Rows 7 to 9:
- sc in each stitch (7 stitches per round)

Joining Legs & Body Start
- Joining:
- Connect the two legs with chain 4 stitches.
- Crochet around both legs and the chain to join (22 stitches).
Body
- Rows 3 to 8:
- sc in each stitch (22 stitches)
- Row 9:
- [ 3 sc, dec ] 4 times, then 2 sc (18 stitches)
- Row 10:
- sc in each stitch (18 stitches)
- Row 11 (Attach Arms):
- 6 sc, 2 sc through arm/body join, 5 sc, 2 sc through arm/body join, 3 sc (18 stitches)
- Row 12:
- dec, 8 sc, dec, 6 sc (16 stitches)
- Row 13:
- [ dec, 2 sc ] repeat around (12 stitches)
- Row 14:
- dec all around, fasten off (6 stitches)
- Stuff body firmly before closing.
Ears and Muzzle
Ears (Make 2)
- Start with a magic ring, 6 sc in the ring. Fasten off and leave tails for sewing.
Muzzle
- Start with a magic ring, 6 sc inside.
- Work 2 additional rounds of 6 sc (3 rounds total).
- Fasten off with a tail for attaching.
Assembly & Finishing Touches
- Stuffing: Firmly stuff head, arms, legs, and body to maintain shape.
- Attach Ears: Sew ears symmetrically near the top sides of the head.
- Attach Muzzle: Sew muzzle centrally on the front of the head, just below the midpoint.
- Attach Arms: Sew arms securely along the body sides between rounds 10 and 12 as indicated.
- Attach Legs: Sew legs firmly under the body ensuring stability.
- Weave in all yarn ends to prevent unraveling.

Final Words
You’ve just completed a delightful mini-bear amigurumi made simply with single crochet stitches! This pattern provides a fun and approachable project to build your skills and create a cherished little companion. Enjoy gifting your handmade bear or adding it to your own collection.