
Crochet Amigurumi Pikachu Free Pattern With Iconic Red Cheeks
Power up your toy collection with this Crochet Amigurumi Pikachu Free Pattern featuring a bright yellow body and an adorable little face.
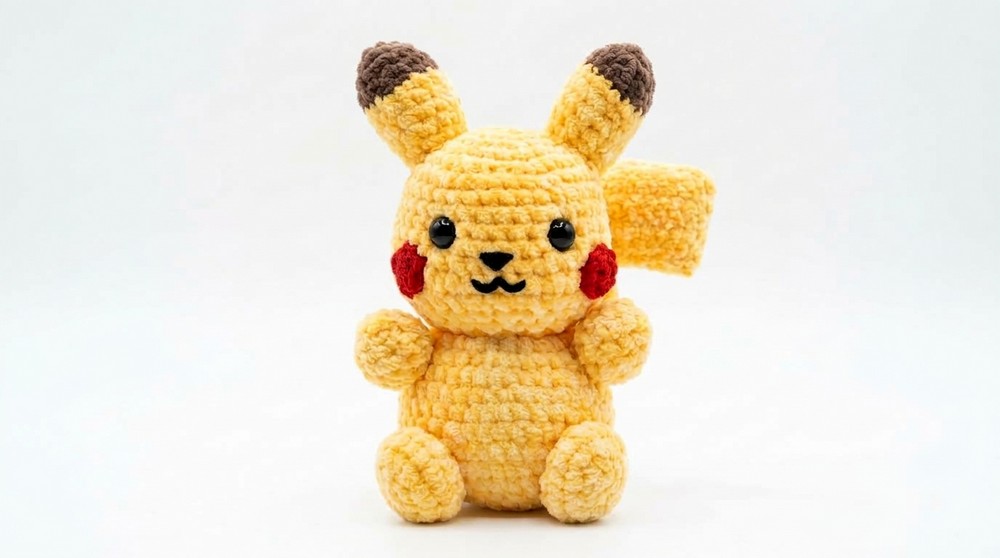
A small, soft toy that looks like the famous yellow Pokémon with bright red cheeks and pointy ears. The Crochet Amigurumi Pikachu is round and cuddly, making it nice to hold and fun to have nearby.
The size of this Pikachu usually fits in your hand. It is about 6 to 8 inches tall, not too big or small. Its shape is a bit chubby and round, with short arms and legs adding to its cuteness. The ears are long and pointy with black tips, and the face shows big, friendly eyes. Bright red circles on the cheeks make it easy to recognize.
Cute Crochet Amigurumi Pikachu Free Pattern For Fans

For people interested, this project suits both beginners and those with some experience. The main stitches are single crochet, increase, and decrease. These help shape the round body, head, and limbs nicely. While the basic form is easy, the ears and tail need a bit of care.
In short, the Crochet Amigurumi Pikachu is created by Tash's Crochet ♡a friendly, soft toy. It makes a nice gift and a fun project, especially for Pokémon fans.
Pikachu Amigurumi Crochet Pattern
This Pikachu amigurumi crochet project is organized by body part and step, offering systematic instructions on building each piece for precise assembly. Features such as cheeks and tail are designed to closely match Pikachu’s animated likeness, with all shaping, colorwork, and details incorporated in a clear, methodical way.
Pattern Basic Points
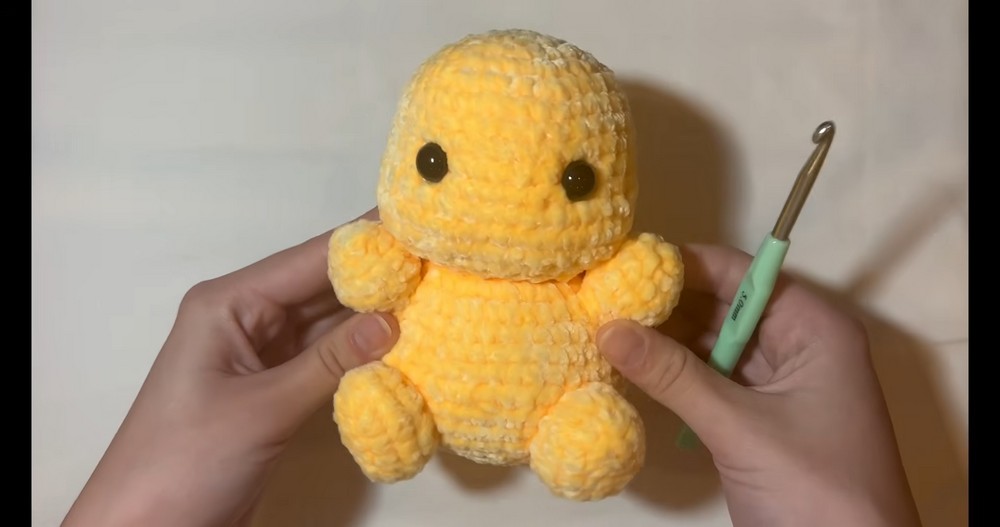
- The head and body are formed in one continuous piece, shaped first with increases and later with decreases.
- Cheeks are incorporated with strategic increases and decreases during the crocheting of the face.
- Limbs are simple tubes, worked in the round and easily attached to the body.
- Pikachu’s ears use color switching and back loop technique to create distinctive brown and yellow stripes.
- The signature zigzag tail is crocheted flat in two pieces, then sewn together for a sturdy finish.
Special Notes
- Accurate stitch counting is critical, especially for the head and body shaping. Use stitch markers to track each round.
- Incorporate color changes cleanly for the ears and the tail for crisp, defined markings.
- For facial features including eyes and mouth, use felt or embroidery according to preference for sharpness and safety.
- All limbs and details should be firmly but gently sewn to ensure secure and proportional assembly.
- The flat construction of the tail gives it durability and iconic shape; light stuffing between the two tail pieces is optional for extra dimension.
Skill Level
This pattern is suited for adventurous beginners to intermediate crocheters. Familiarity with techniques such as working in the round, increasing, decreasing, color changes, back loops only, as well as basic seaming and embroidering, is required.
Materials
- Yarn: Worsted or DK weight in yellow, brown, red, black, and a small amount of white (for felt or embroidery)
- Crochet hook: 3.0 mm or size to match yarn
- Tapestry (yarn) needle
- Stuffing: Polyester fiberfill
- Scissors
- Pins (for assembly)
- Optional: Black, white, and brown felt for eyes, nose, and mouth instead of embroidery
Measurements and Gauge
- Finished size: Approximately 12–15 cm tall, depending on yarn/hook and personal tension
- Gauge: Not critical for amigurumi, but stitches should be tight enough that stuffing does not show through. For reference, 6 sc = 2 cm in width with recommended yarn and hook.
Stitch Abbreviations
- sc: single crochet
- inc: increase (2 sc in the same stitch)
- dec: decrease (sc two together)
- ch: chain
- sl st: slip stitch
- BLO: back loops only
- st/sts: stitch/stitches
Special Stitches
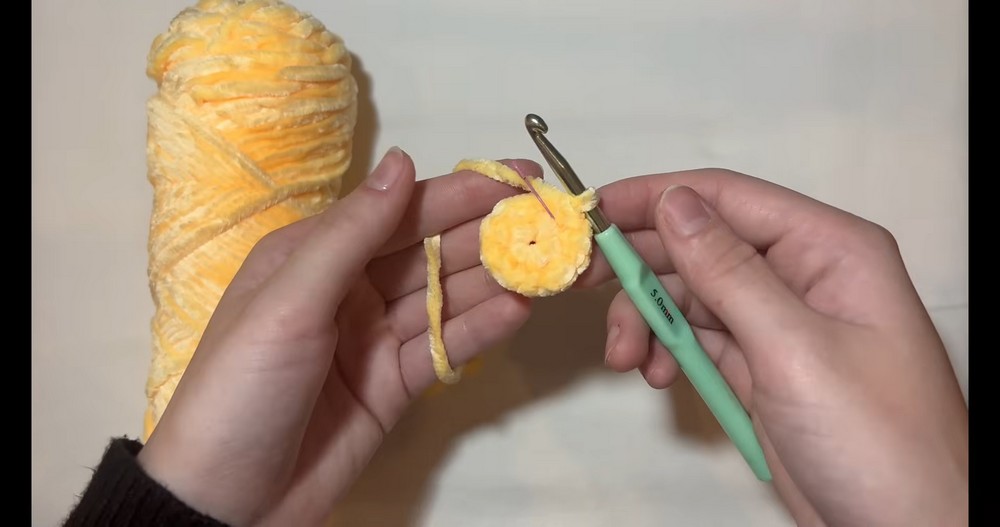
- Magic Ring: Create an adjustable loop and crochet stitches into it, then pull tight to close.
- Back Loops Only (BLO): Work each stitch in the back loop only for that round.
- Flat construction: Work rows back and forth with turning to create flat pieces (used for tail).
Detailed Crochet Pattern
Head & Body (Yellow)
- Round 1: 7 sc into magic ring.
- Round 2: Inc in each st around (14 sts).
- Round 3: 1 sc, inc repeat around (21 sts).
- Round 4: 2 sc, inc repeat (28 sts).
- Round 5: 3 sc, inc repeat (35 sts).
- Rounds 6–10: Work even, 35 sc per round.
- Round 11: 5 sc, 6 inc (for right cheek), 4 sc, 6 inc (for left cheek), 14 sc (47 sts).
- Round 12: 47 sc.
- Round 13: 5 sc, 6 dec (cheek shaping), 4 sc, 6 dec, 14 sc (35 sts).
- Round 14: 3 sc, dec repeat (28 sts).
- ADD Eyes
- Round 15: 2 sc, dec repeat (21 sts).
- Round 16: 1 sc, dec repeat (14 sts).
- Round 17: 1 sc, inc repeat (21 sts).
- Round 18: 2 sc, inc repeat (28 sts).
- Round 19: 3 sc, inc repeat (35 sts).
- Round 20: 4 sc, inc repeat (42 sts).
- Round 21: 5 sc, inc repeat (49 sts).
- Rounds 22–23: 49 sc per round.
- Round 24: 5 sc, dec repeat (42 sts).
- Round 25: 4 sc, dec repeat (35 sts).
- Round 26: 3 sc, dec repeat (28 sts).
- Round 27: 2 sc, dec repeat (21 sts).
- Round 28: 1 sc, dec repeat (14 sts).
- Round 29: Dec around (7 sts).
- Round 30–32: Slip stitch 3 times, fasten off and close.

Feet (Make 2, Yellow)
- Round 1: Ch 5. Start in 2nd ch from hook: 3 sc, 3 sc in last ch, 3 sc on other side of chain, 1 sc (10 sts).
- Round 2: Inc around (20 sts).
- Round 3: 20 sc.
- Round 4: Dec around (10 sts).
Arms (Make 2, Yellow)
- Round 1: 4 sc into magic ring.
- Round 2: Inc in each st (8 sts).
- Round 3: 1 sc, inc repeat (12 sts).
- Round 4: 12 sc.
- Round 5: 1 sc, dec repeat (8 sts).
- Round 6: 8 sc.
Cheeks (Make 2, Red)
- Round 1: 4 sc in magic ring. Finish with sl st.
Ears (Make 2; Brown for base, then Yellow)
- Round 1: 6 sc in magic ring (brown).
- Round 2: Inc in each st (12 sts, brown).
- Rounds 3–5: Switch to yellow and work BLO, 12 sc per round.
- Round 6: 12 sc.
- Round 7: 4 sc, dec repeat (10 sts).
- Round 8: 10 sc.
Tail (Brown and Yellow)
- Piece A (Front):
- With brown, ch 6. Turn, sc 5 across.
- Continue working in rows to form zigzag pattern; change color to yellow at appropriate point for stripes.
- Follow video-referenced row increases and decreases to create Pikachu’s signature shape.
- Fasten off.
- Piece B (Back): Repeat as for Piece A for matching shape.
- Final Step: Place both pieces together, wrong sides facing, and sc or whipstitch around. Add light stuffing if desired before fully closing.

Assembly & Finished Size
- Use pins to position feet, arms, ears, tail, and cheeks onto the stuffed head/body.
- Sew pieces securely in place with matching yarn and tapestry needle.
- Add facial features (eyes, mouth, nose) using felt or embroidery for best safety and sharpest results.
- Ensure ear tops are slightly pointed, tail is angled upward, and cheeks are prominent.
- Finished Pikachu stands about 12–15 cm tall.

Conclusion
This Pikachu amigurumi pattern provides concise, logically sequenced instructions, focusing on accuracy in stitch count, shapely transitions, and clear methods for facial detailing. The stepwise approach and use of common shaping techniques make it accessible for newer crocheters while offering opportunities for customization and refinement for more experienced makers. The result is a classic, playful Pikachu plush, perfect for fans and crocheters alike, sturdy enough for display or gentle play, and inviting the addition of personal flair in assembly and finishing techniques.