
Mini Crochet Amigurumi Mushroom Hat Free Pattern For Cute Gifts
Create a cozy and charming look with this free Crochet Amigurumi Mushroom Hat pattern that is simple to follow and perfect for adding a handmade touch.
A tiny mushroom wearing a hat can look like a character from a children's storybook. The Crochet Amigurumi Mushroom Hat is a cute yarn toy that has a fun appearance and a little persofnality of its own. Its unusual style gives the mushroom a sweet look that is different from a regular forest mushroom.
Free Crochet Amigurumi Mushroom Hat Pattern With Cute Spots
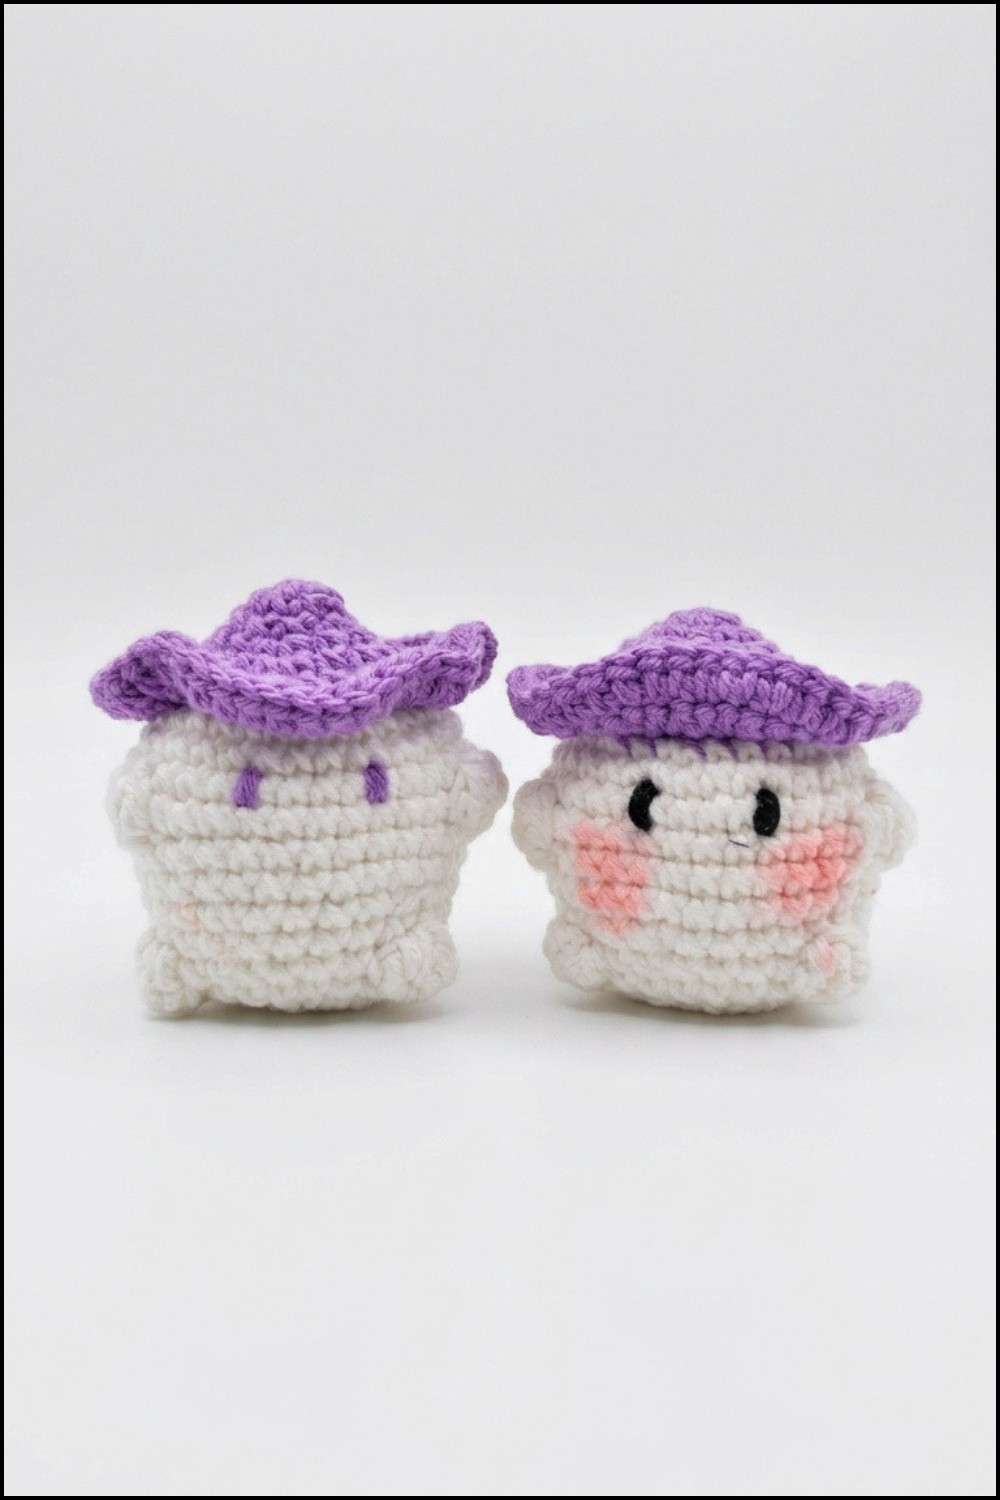
The hat is one of the nicest parts of this design. It sits above the mushroom's head and gives the figure a dressed-up appearance. The little face can have bright eyes and a tiny smile, making the character look friendly. Its short body and rounded shape add to its funny appearance. You can choose soft pink, light brown, or cream yarn for a gentle color combination.
This mushroom can be crocheted using simple stitches. The main body is worked into a small shape, while the hat is prepared separately to fit over the top. A small amount of stuffing can help the figure stay firm. The facial features are then added to give the mushroom its own expression.

The little hat gives this mushroom a playful identity. Its simple shape and friendly face turn an ordinary forest plant into a charming character that feels right at home in a storybook.
Crochet Mushroom Keychain Pattern
About the Pattern
This design creates a charming, rounded mushroom keychain featuring a textured cap and a detailed, slightly ridged stem. The finished piece captures the whimsy of toadstool mushrooms and incorporates classic amigurumi elements such as tight seamless rounds, increases for shaping, and popcorn stitches for decorative white spots. A clear distinction between the cap and stem is created with strategic working in front and back loops, offering a crisp, professional look. The embroidery of expressive eyes ensures each mushroom is unique and full of character.

Pattern at a Glance
- Cap Construction: Begins from the top, worked in steadily increasing rounds, and then made dramatically wider via an expansion in the front loops to form the classic “hat brim.”
- Stem/Base: Picked up in the back loops left from the cap, worked directly down; decorative popcorn stitches form the mushroom’s distinctive polka-dot spots.
- Finishing: Keychain ring can be sewn securely at the top, making it functional and decorative.
Important Notes
- Work in continuous rounds unless stated, using a stitch marker to keep track of rounds.
- Ensuring correct stitch count after each round is essential for the cap’s brim and the snug fit between cap and stem.
- Popcorn stitches are easier to perform using a slightly looser tension—avoid over-tightening these sections.
- Embroidery for the eyes should be added after stuffing and closing the body for proper facial proportions.
Difficulty Level
- Confident Beginner to Intermediate: Techniques include working in spirals, increasing, decreasing, front/back loop only stitches, popcorn stitches, and simple embroidery.
Supplies Needed
- Red yarn (cap)
- White yarn (stem and cap spots)
- 2.2–2.5 mm crochet hook (or size to produce tight, neat fabric)
- Fiberfill (stuffing)
- Black embroidery thread or yarn (for eyes)
- Yarn needle (for sewing and embroidery)
- Small scissors
- Stitch marker
- Keychain ring (optional)
Size & Measurements
- Finished size: approx. 5 cm tall and 4–4.5 cm in diameter (at the cap), excluding keychain ring.
Gauge & Stitch Details
- Gauge is not critical, but stitches must be tight enough to prevent stuffing visibility.
- Consistency is more important than a specific stitch count per inch/cm for uniform results.
Crochet Abbreviations
- sc – single crochet
- inc – increase (2 sc in one stitch)
- dec – decrease (sc 2 stitches together)
- ch – chain
- sl st – slip stitch
- MR – magic ring
- st(s) – stitch(es)
- flo – front loop only
- blo – back loop only
- popcorn – popcorn stitch (see Special Stitch Guide)
Special Stitch Guide
- Magic Ring (MR): Adjustable ring for tight, seamless start.
- Front/Back Loop Only (flo/blo): Work into only the front or back half of each stitch as directed.
- Popcorn Stitch: Work 4 (or more, per pattern) sc into the same stitch, remove hook from working loop, insert into first of those sc, draw working loop through to “pop” out the cluster.
Complete Crochet Pattern
Mushroom Cap (Red Yarn)
1 Round :
- Magic ring, work 6 sc into ring (6 sts)
2 Round :
- Inc in every stitch: (2 sc in each) around (12 sts)
3 Round :
- 1 sc in each stitch (expect 12 sc, but verify; if you gain/lose a stitch, continue with the actual count)
4 Round:
- (1 sc, 1 inc) repeat around (18 sts)

5 Round:
- (1 sc, 1 inc, 1 sc) repeat around (24 sts)
6 Round:
- (2 sc, 1 inc) repeat to reach 25 sts (25 sts)
7 Round:
- 25 inc (flo): Work 2 sc in the front loop only of each stitch from the previous round
(50 sts) This creates the cap’s brim and leaves back loops free for stem.
8 Round:
- 1 sc in each stitch (50 sts)
9 Round:
- 1 sc in each stitch (50 sts)
Inner Body (Stem Base, White Yarn)
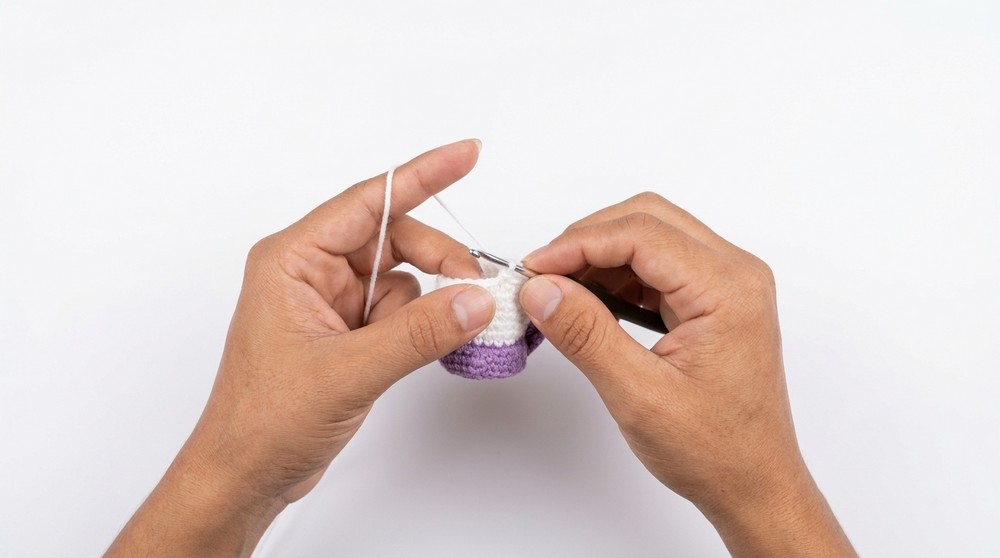
Attach white yarn to the unused back loops of Round 7 of the cap.
1 Round:
- (3 sc, 1 inc) repeat (31 total; evenly spaced increases)
2-3 Rounds :
- 1 sc in each stitch (31 sts per round)
4 Round:
- 9 sc, popcorn stitch, 11 sc, popcorn stitch, 9 sc
(Popcorn stitches should be placed symmetrically for the mushroom’s dots.)

5-6 Rounds :
- 1 sc in each stitch (31 sts per round)
7 Round:
- 3 sc, 1 dec, finish with 1 sc (decreases begin narrowing the stem)
8 Round:
- 1 sc in each stitch (work even for smooth decrease)
9 Round:
- 8 sc, popcorn, 7 sc, popcorn, 8 sc (popcorns aligned for another row of “dots”)
10 Round:
- 1 dec, then 1 sc in each remaining stitch (gently tightens base)
11 Round:
- (1 sc, 1 dec) repeat (reduces stitch count; continue working evenly around)
Stuff with fiberfill to desired firmness.
Closing:
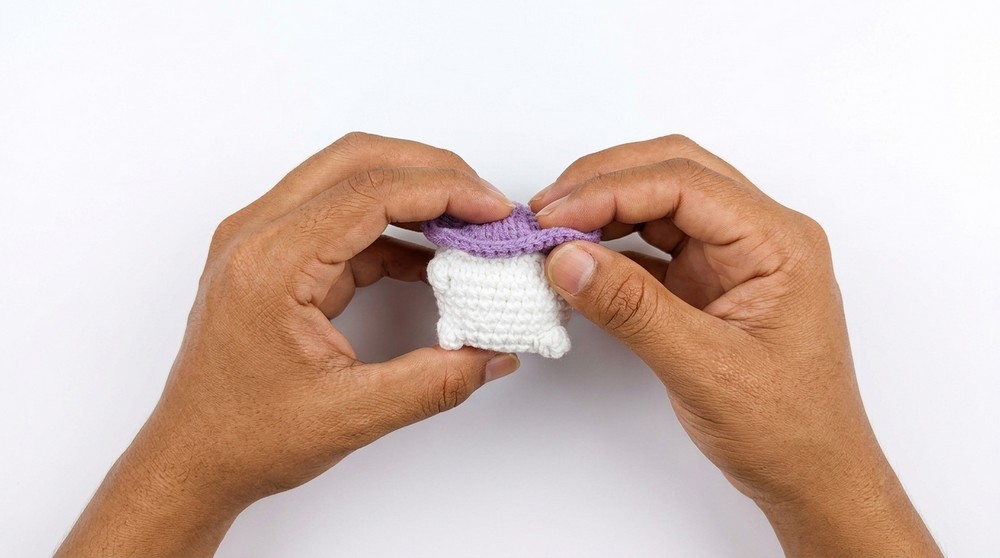
- 7 consecutive decreases to close up the base. Use the yarn tail and needle to pull through front loops of the final stitches to cinch the hole shut. Weave in the end securely inside the piece.
Finishing Touches
Eyes:
- Using black embroidery thread, stitch two small eyes on the stem/base portion, between the “dot” rows, keeping a distance of 4 stitches between the centers for even, wide-set placement.
Keychain Ring:
- Attach keychain hardware securely through the center of the cap, pulling through stitches several times so it will withstand repeated use as a charm or bag accessory.
Assembly & Finished Size
- Gently mold the mushroom body if needed for a rounded, upright appearance.
- Confirm that all ends are trimmed and pulled inside for safety and neatness.
- The finished amigurumi measures approximately 5 cm tall, with a cap diameter of 4–4.5 cm, and the keychain ring adds minimal extra height.
Conclusion
This mushroom keychain exemplifies effective use of basic amigurumi construction with eye-catching details and approachable skill requirements. The crisp color changes, dimensional popcorn stitches, and neat embroidered expression allow for individual customization while maintaining the charm of the classic toadstool form. Small in scale but big in personality, this project is ideal for gifting, markets, or everyday whimsical accessorizing.