
Free Crochet Bunny Bag Pattern
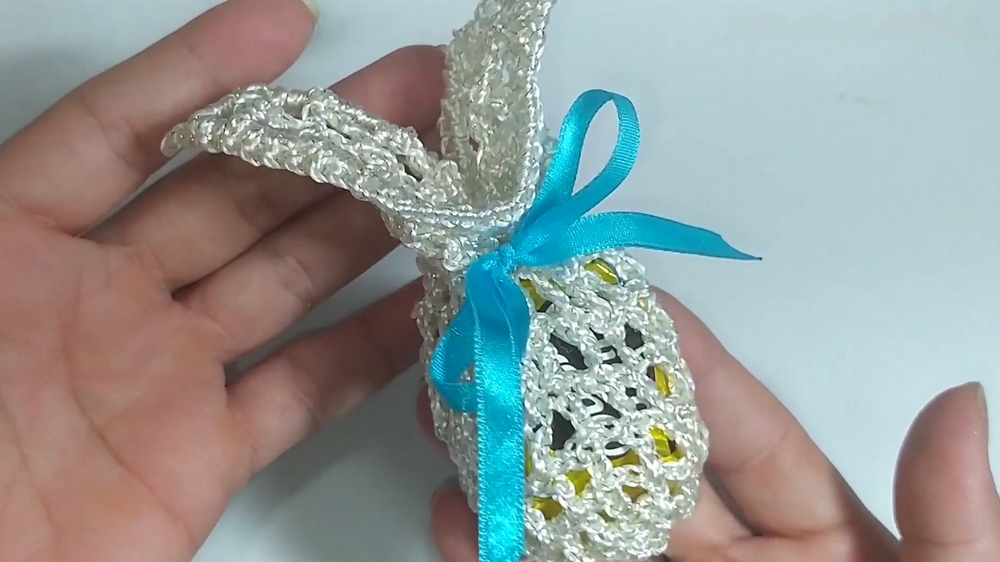
Hop into style with this Crochet Bunny Themed Bag Pattern that’s easy, fun, and perfect for adding a playful touch to your accessories collection.
What began as a simple gift for a child’s spring celebration has grown into a charming accessory loved by all ages, a crochet bunny themed bag that combines whimsy with everyday usefulness. Inspired by nostalgic memories of hand-stitched toys and handmade treasures, this bag carries more than just small essentials; it carries a touch of comfort, a hint of playfulness, and the unmistakable joy of thoughtful detail.
Cute Crochet Bunny Themed Bag Pattern
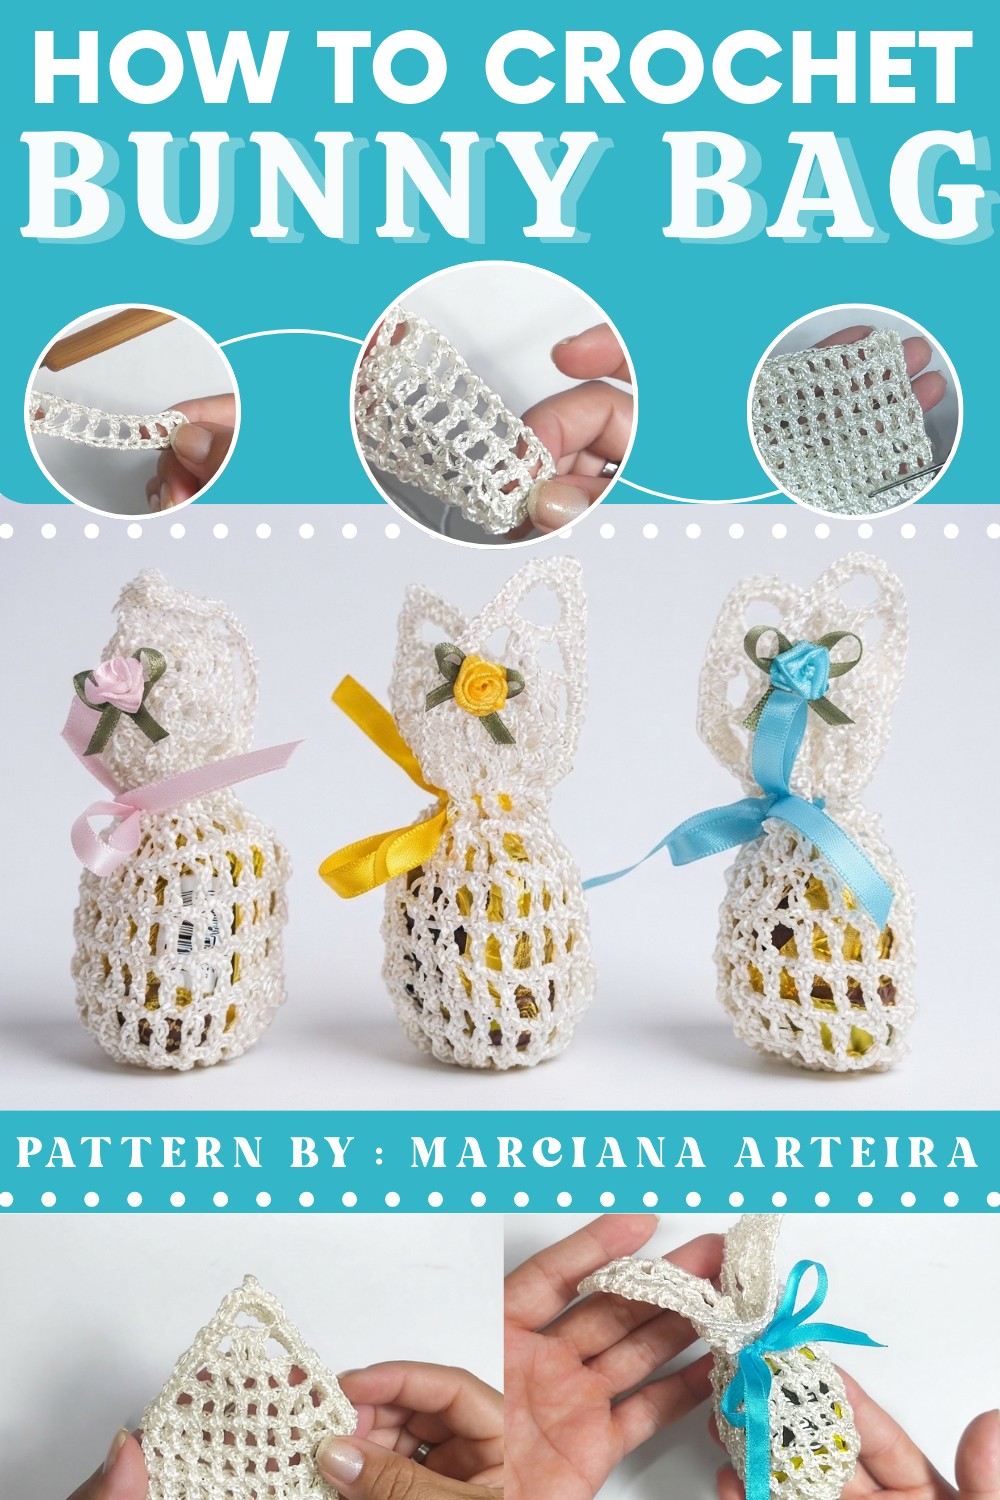
Shaped with soft curves and gentle textures, its bunny ears and sweet facial features add character without overwhelming the design. The Bunny Themed Bag offers just the right size for carrying treats, small toys, or personal items, making it ideal for festive occasions, casual outings, or even seasonal décor.
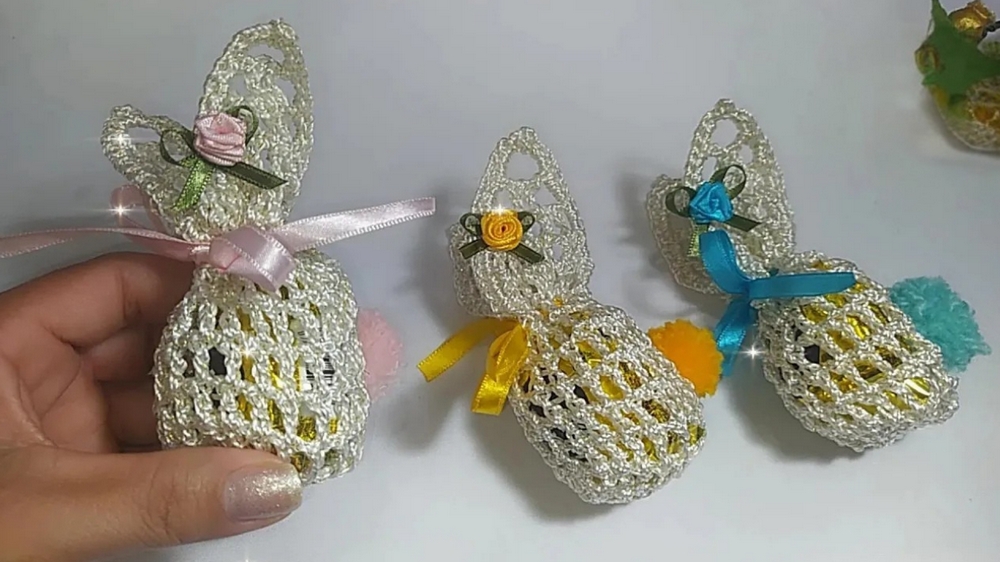
Durable yet soft, the structure holds its shape while remaining flexible, allowing it to be stored or carried with ease. Whether given as a gift or used as a personal touch for themed events or holidays, it speaks to the quiet joy of meaningful items. This bunny-themed bag isn’t just playful—it’s a gentle reminder of how warmth and style can live side by side.
Cute Free Crochet Bunny Bag Pattern
Finished Size
The completed bunny gift bag measures approximately 8 cm (width) and 12 cm (height), including the bunny ears.
Materials Needed
- Yarn: Thick silk thread (Tex 288, 100% polypropylene).
- Main Color: Glossy white or color of choice for the bunny.
- Optional Tail: Wool or polyester yarn for the tail.
- Crochet Hook: 1.75mm.
- Ribbon: 32 cm of ribbon (size #1) or crocheted chain for the closure.
- Alternative: Decorative string or satin ribbon for customization.
- Optional Decorations:
- Rococo flower or small bows for adornment (optional).
- Hot glue for attaching the decorations securely.
- Scissors: For cutting yarn or thread.
- Lighter: For sealing polypropylene thread to prevent fraying.
- Tapestry Needle: For sewing pieces and finishing ends.
Gauge
Exact gauge is not critical. However, to maintain structure:
- 18 stitches x 16 rows in double crochet = 4 inches using a 1.75mm hook.
Special Techniques
- Foundation Double Crochet: Provides elasticity and looks neater for chains in bags.
- Slip Stitch Join: Ensures seamless transitions when working in rounds.
- Making a Pom-Pom: The bunny tail is made by winding the yarn around fingers to form a pom-pom.
Pattern Instructions
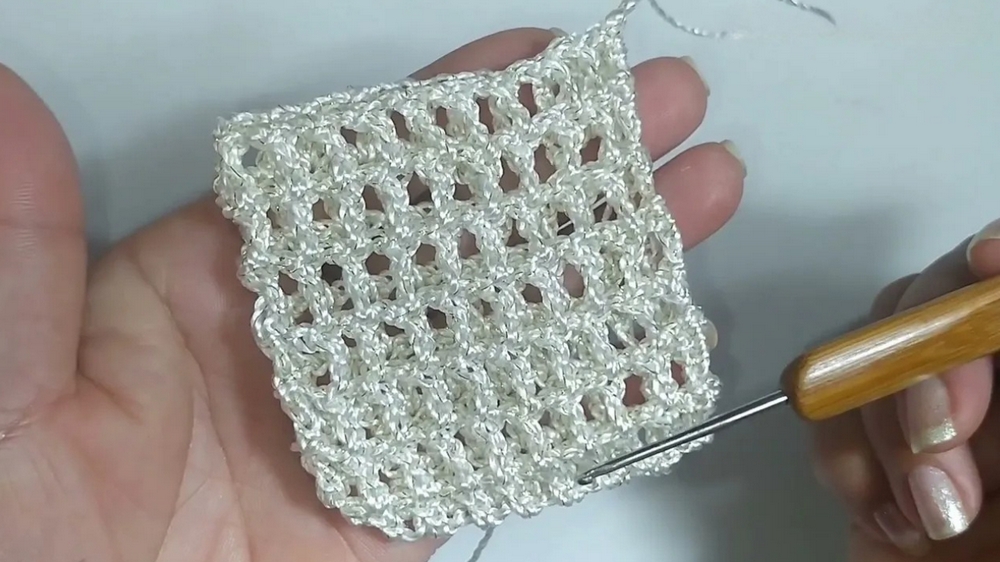
Step 1: Create the Base
- Start with a Chain:
- Chain 20 stitches.
- Add 5 extra chains for turning.
- Row 1 (Foundation):
- In the 5th chain from the hook, work 1 dc.
- Ch 1 (separation). Skip 1 chain and work 1 dc into the next chain.
- Continue alternating ch 1 and 1 dc across.
- At the end of the chain (last stitch), make 1 ch (separation) and turn to work on the opposite side of the chain.
- Row 2 (Opposite Side):
- Work 1 dc into the same stitch as before, then ch 1.
- Continue working 1 dc and ch 1 into each corresponding stitch on the opposite side, ensuring symmetrical spacing.

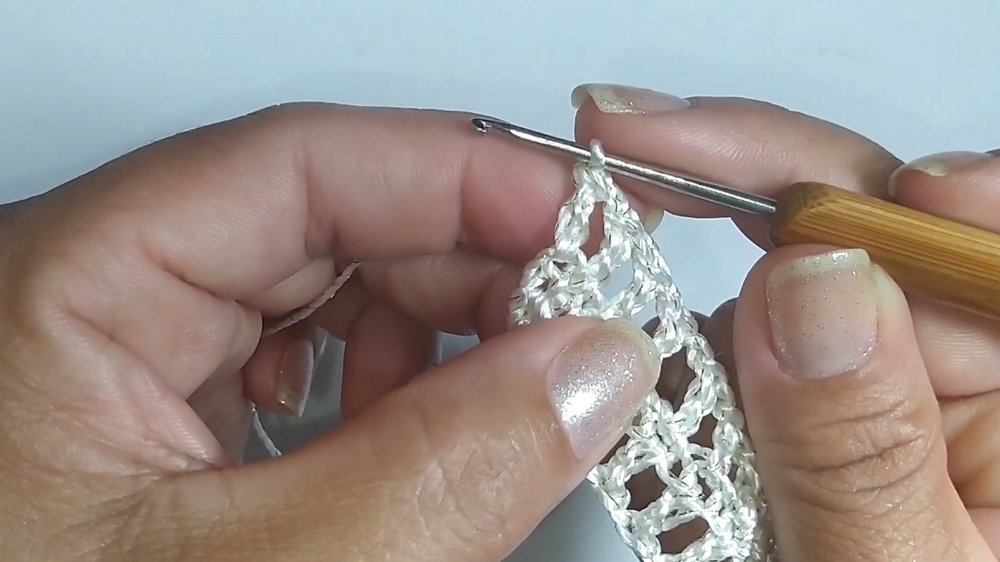
Step 2: Form the Bunny Bag Body
- Rows 3–7:
- Repeat: At the start of each row, ch 4 (counts as the first dc and chain separation), and continue working 1 dc + ch 1 across the row.
- Join the rows with a sl st into the top of the third chain of the previous round.
- Continue this pattern until you have 7 rows of alternating dc and ch 1.
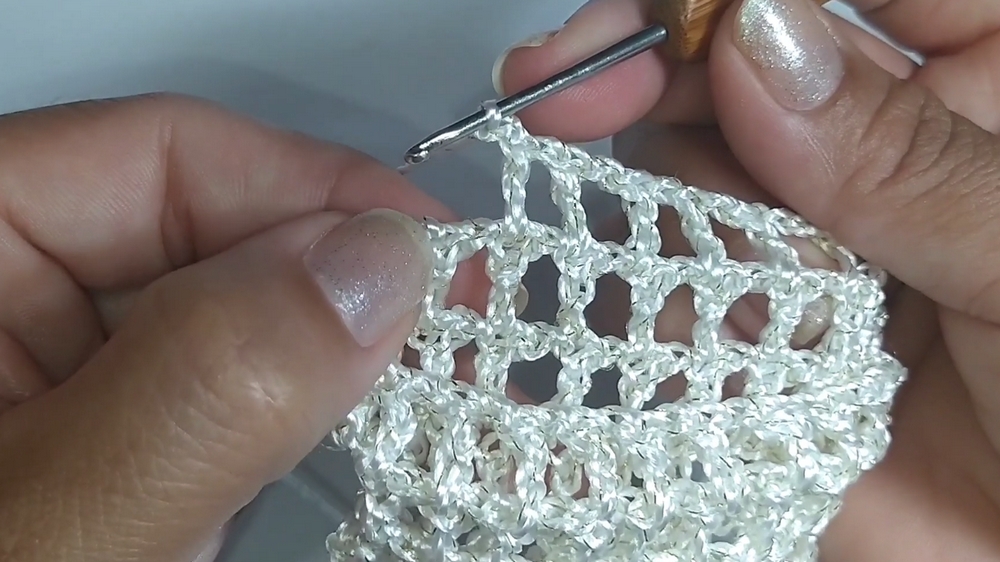
Step 3: Create Bunny Ears
- Start Ears:
- After completing Row 7, divide the stitches in half (10 dc on each side).
- Start working the bunny ear on one group of 10 dc.
- Rows for Bunny Ear:
- Row 1: Ch 4, skip one stitch, and work 1 dc into the next stitch. Continue with ch 1 + 1 dc until reaching the end.
- Row 2: Turn work, ch 4, skip the first stitch, and work as before. Continue reducing by skipping one stitch at the beginning of each row.
- Repeat reductions until you have 4 dc remaining on the row.
- Finishing the Ear:
- Create ch 4, skipping 2 stitches before working 1 dc into the last stitch of the row. Fasten off securely.
- Create Second Bunny Ear:
- Repeat the same steps for the other group of 10 dc.
Step 4: Edging and Decorating
- Edging:
- Work around the entire bag with sc to give a polished finish:
- In each gap of the stitches at the edges, work 3 sc to create a neat border.
- At the tip of each ear, create a decorative picot:
- Ch 2, sl st into the last sc to form a peak.
- Work around the entire bag with sc to give a polished finish:
- Tail:
- Using wool or polyester thread, cut a piece of yarn and wind it 30 times around your fingers to form a bundle.
- Tie the bundle tightly in the middle with a separate strand of yarn. Cut the loops, fluff the pom-pom, and sew it securely to the back of the bag.
Step 5: Ribbon Closure
- Inserting Ribbon:
- Begin at one end of the bag and thread the ribbon or string through the ch 1 spaces around the top edge to form a drawstring closure.
- Finishing Touch:
- Tie the ends of the ribbon into a neat bow for additional decoration.
Customization Ideas
- Embellishments:
- Add a small rococo flower or bows near the ears for an extra decorative touch.
- Color Options:
- Use pastel shades for the bag (light pinks, blues, or yellows) as Easter-themed alternatives.
- Purpose Variations:
- Use as party favors, pencil cases, or small accessory holders.
Conclusion
Your delightful bunny gift bag is complete! This handmade bag is ideal for Easter gifting and will surely bring a smile to anyone who receives it. The combination of fun bunny ears and the textured pom-pom tail adds whimsy, while the functional ribbon clasp ensures practicality.
Tips for Maintaining Pattern Quality
- Use consistent tension when working stitches, especially for the edging and ears.
- Seal yarn ends securely (with a lighter if using polypropylene yarn).
- For a stiffer bag, avoid overstuffing or stretching stitches.