
Quick Free Crochet Love Sick Frog Pattern That’s Perfect for Gifting
Hop into charm with this Crochet Love Sick Frog Pattern, full of personality, emotion, and perfect for heartfelt gifts or quirky collections.
Long before emojis and quick texts, tokens of affection spoke louder through thoughtful, personal gestures. A small frog hugging a bright red heart tells a story no app can replicate—its wide, innocent eyes and sweet blush reveal everything unsaid. This love sick frog captures that timeless expression of tender, sometimes awkward, affection with undeniable charm.
Easy Free Crochet Love Sick Frog Pattern For Love Notes
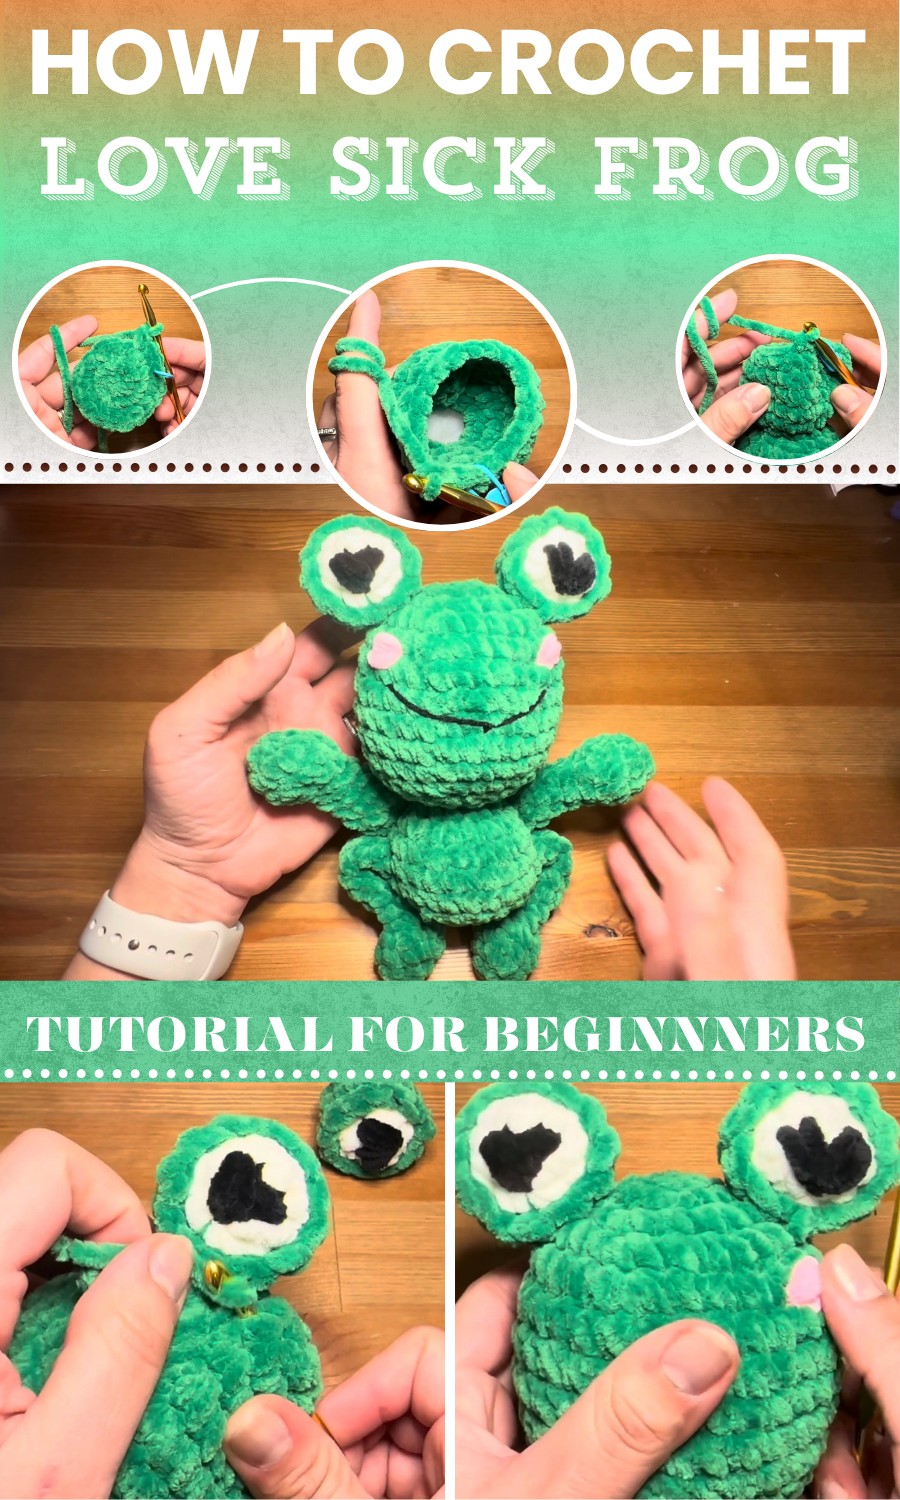
Its body is shaped with soft, rounded curves using single crochet, increase, and decrease stitches. The oversized eyes, heart accent, and blush details are the highlights, giving it personality and warmth. Assembly is minimal, making it approachable for confident beginners or anyone wanting a fun, expressive project without overwhelming complexity.
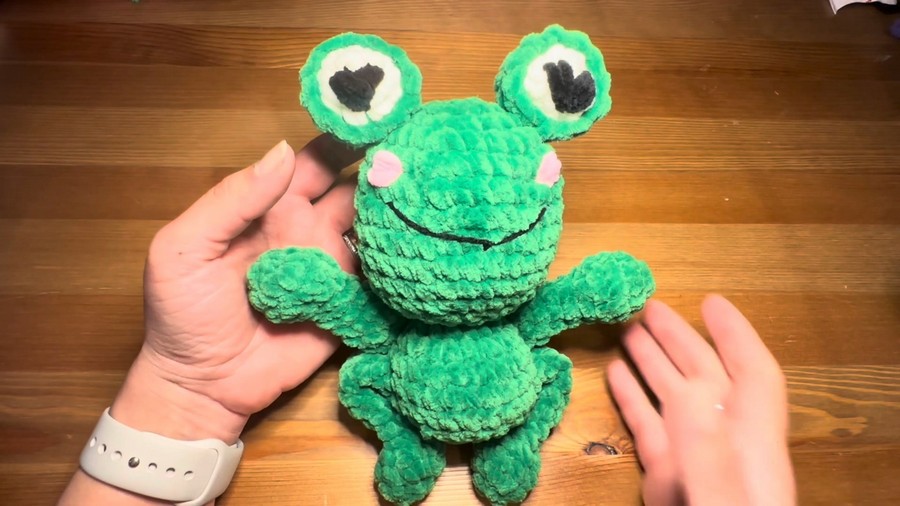
Ideal for Valentine's Day, anniversaries, or just because, this frog fits perfectly on a desk, shelf, or gift box. The colors and expression create an emotional connection, offering humor and heart all at once. It’s a reminder that even in yarn, love can look a little green, a little silly, and absolutely sincere.
Cute Free Crochet Love Sick Frog Pattern
Finished Size
- Approximately 10–12 cm (4–5 inches) tall and wide, depending on your yarn and tension.
Materials
Yarn
- Plush Yarn, Chunky Weight (main color):
- Green: Body, arms, legs, and eyes.
- Pink: Blush details.
- Black: Eye details.
- DK–Weight Yarn (optional):
- Black for embroidering the mouth.
Tools
- Crochet Hook: 5.5 mm for a tight stitch.
- Darning Needle: For embroidery and assembly.
- Scissors: For cutting yarn safely and neatly.
- Stitch Marker: To track the beginning of rounds while working in spirals.
- Fiberfill: Soft stuffing for the frog's body and limbs.
Gauge
- Gauge is not essential for this project. However, ensure stitches are tight to prevent the stuffing from showing through.
Skill Level
Intermediate
- Techniques include working in spirals, single crochets, decreases, and slight embroidery.
Special Techniques
1. Magic Ring
- A method to start crocheting in a circle without leaving a hole in the middle. Alternatively, create a slip knot and chain 2, working into the second chain from the hook.
2. Invisible Decrease
- Insert your hook into the front loops only of the next two stitches, yarn over, and pull through both loops. Yarn over again and pull through all remaining loops on the hook.
Pattern Instructions
Step 1: Frog's Head and Body
Foundation:
- Using green plush yarn, create a slip knot or magic ring.
- Round 1: Work 6 sc into the ring. Pull the tail tight to close the hole. (6 stitches)
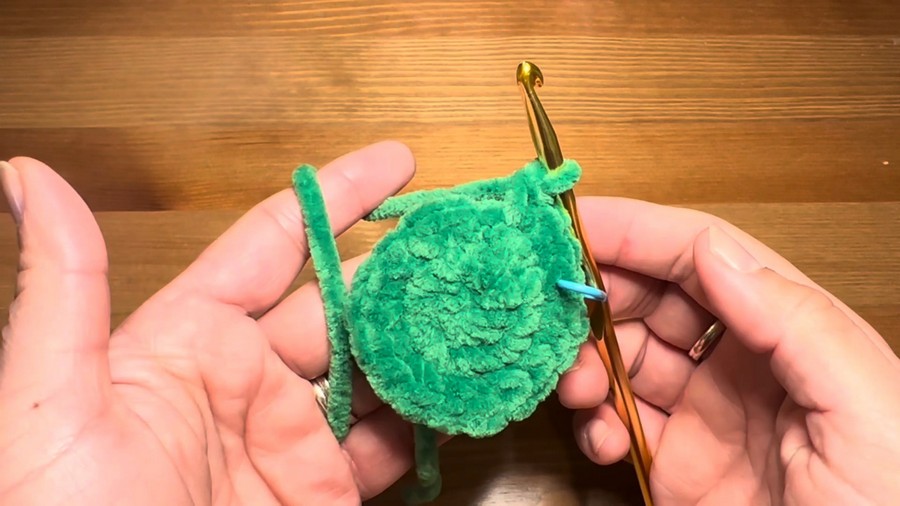
Round 2:
- Work 6 increases (2 sc in each stitch). (12 stitches)
Round 3:
- 1 sc in the first stitch, place a stitch marker.
- 1 inc in the next stitch.
- Repeat: (1 sc, 1 inc) 6 times around. (18 stitches)
Round 4:
- 2 sc, then 1 inc in the next stitch.
- Repeat: (2 sc, 1 inc) 6 times around. (24 stitches)
Round 5:
- 3 sc, then 1 inc in the next stitch.
- Repeat: (3 sc, 1 inc) 6 times around. (30 stitches)
Rounds 6–10:
- Work 1 sc in each stitch around. (30 stitches per round)
- Work a total of 5 rounds.
Round 11:
- 3 sc, then 1 dec.
- Repeat: (3 sc, 1 dec) 6 times around. (24 stitches)
Round 12:
- 2 sc, then 1 dec.
- Repeat: (2 sc, 1 dec) 6 times around. (18 stitches)
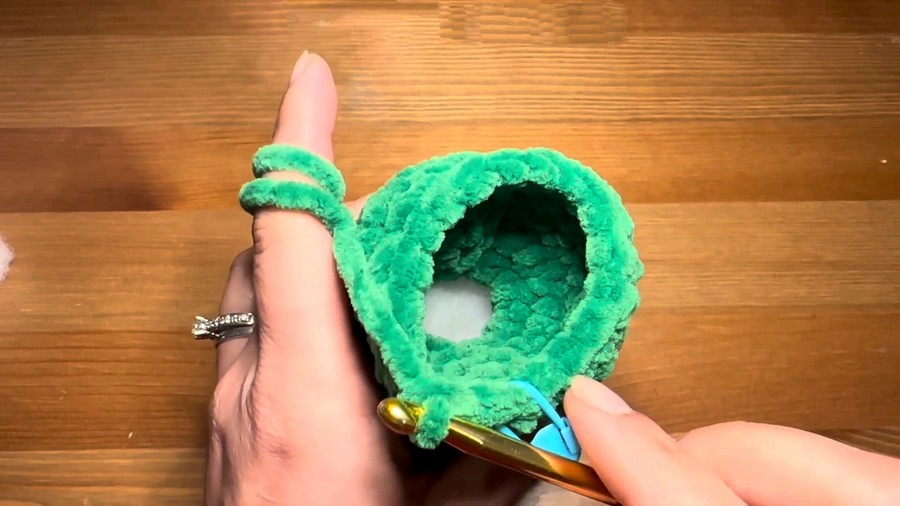
Round 13:
- 1 sc, then 1 dec.
- Repeat: (1 sc, 1 dec) 6 times around. (12 stitches)
Round 14 (Start Body):
- Work 8 increases (2 sc in each stitch). (16 stitches)
Round 15:
- 1 sc, then 1 inc.
- Repeat: (1 sc, 1 inc) 8 times. (24 stitches)
Rounds 16–18:
- Work 1 sc in each stitch. (24 stitches per round)
- Repeat these rounds for a total of 3 rounds.
Round 19:
- 2 sc, then 1 dec.
- Repeat: (2 sc, 1 dec) 6 times around. (18 stitches)
Round 20:
- 1 sc, then 1 dec.
- Repeat: (1 sc, 1 dec) 6 times around. (12 stitches)
Round 21:
- Work 6 decreases evenly. (6 stitches)
Closing the Body:
- Use a darning needle to weave through the front loops of the last 6 stitches. Pull tight to close, secure with a knot, and weave in the ends.
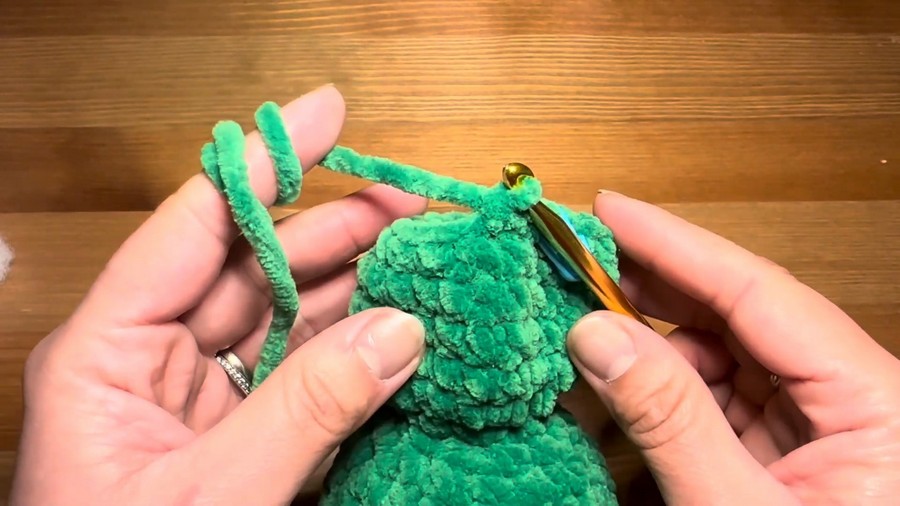
Step 2: Arms (Make 2)
Foundation:
- Work 6 sc into a magic ring.
Round 1:
- 1 sc, then 1 inc.
- Repeat: (1 sc, 1 inc) 3 times. (9 stitches)
Rounds 2–6:
- Work 1 sc in each stitch around. (9 stitches per round)
Round 7:
- 1 sc, then 1 dec.
- Repeat: (1 sc, 1 dec) 3 times. (6 stitches)
- Lightly stuff with fiberfill.
- Close the opening by either weaving or crocheting across and leaving a tail for sewing.
Step 3: Legs (Make 2)
Foundation:
- Repeat the arm instructions, except extend Rounds 2–6 to Rounds 2–11 to make the leg longer.
Step 4: Eyes (Make 2)
Foundation:
- Work 6 sc into a magic ring using green plush yarn.
Round 1:
- Work 6 increases all the way around. (12 stitches)
Rounds 2–3:
- Work 1 sc in each stitch around. (12 stitches per round)
Round 4:
- Change to white yarn.
- Attach to the back loops and work 1 sc in each stitch around. (12 stitches per round)
Closing the Eye:
- Work 4 decreases evenly to bring the stitch count down to 6.
- Close by weaving through the last stitches and stuffing the eye lightly with fiberfill.
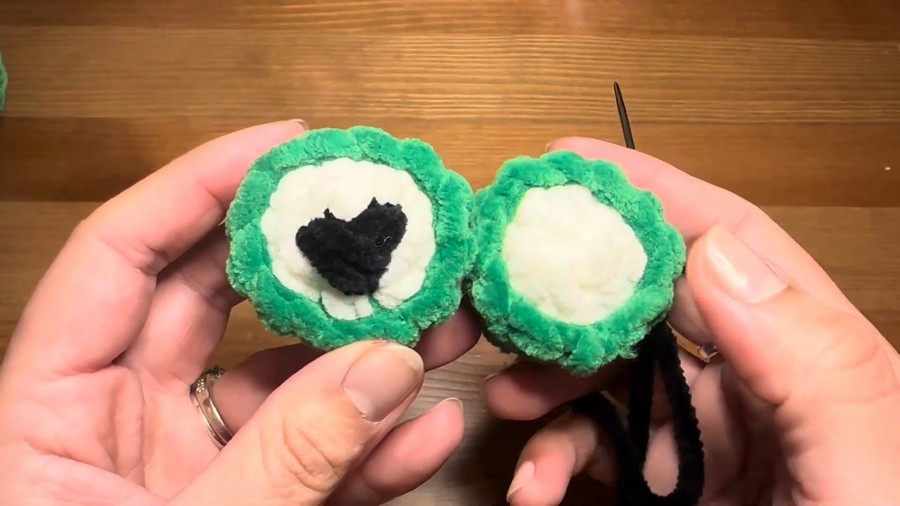
Adding Black Eye Detail:
- Thread black yarn onto your needle.
- Embroider the center of the eye into a heart or classic circular shape. Tie and secure yarn inside the eye.
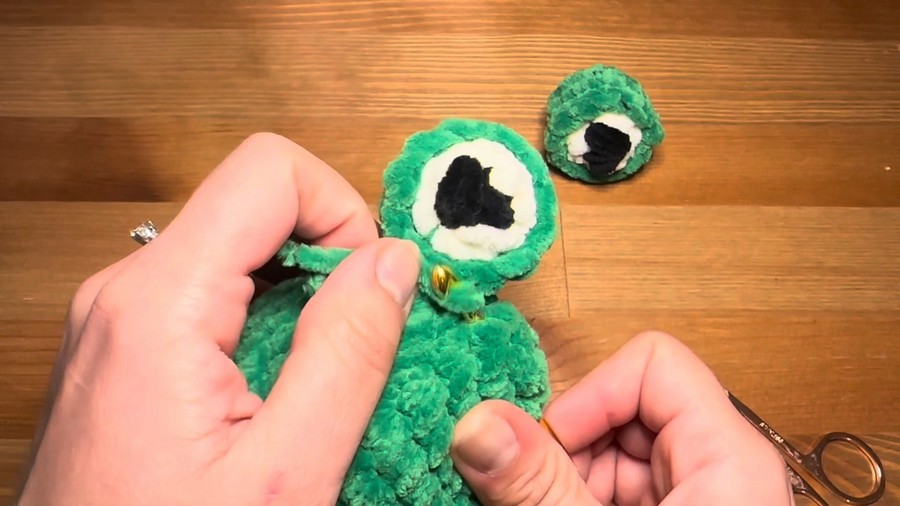
Step 5: Assembly
- Place Eyes on Head: Position the eyes on rounds 3–5, and sew them securely in place, ensuring symmetry.
- Add blush details: Use pink yarn to embroider two small blush spots under the eyes, creating a patch-like effect.
- Embroider the Mouth: Use black DK yarn to embroider a smile, centered between the eyes and blush areas.
- Attach Arms and Legs:
- Sew the arms to the sides of the body, about 2–3 rounds below the head.
- Attach the legs at the bottom of the body to give the frog a sitting position.
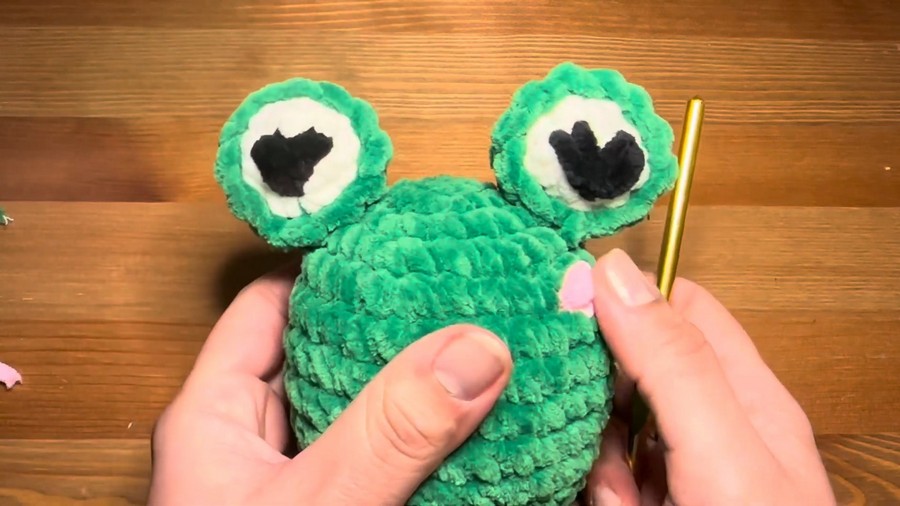
Customization Ideas
- Color Variations: Use pastel colors or add a different-colored tummy for a playful look.
- Personal Touches: Add a little scarf or a mini crown to make your frog extra special.
Finishing Touches
- Ensure all parts are securely attached, especially when gifting to children.
- Shape the frog by gently squeezing the stuffed parts to distribute the fiberfill evenly.
Conclusion
Congratulations on completing your Plush Crochet Frog! With its adorable features and charming details, this project is sure to bring joy to whoever sees it. Customize your frog with additional embellishments to make it even more special.
Important Notes
- Washable yarns and safety eyes are ideal for making child-friendly toys.
- Store leftover yarn properly for your next crochet project!